In this article, we will demonstrate how to install the Derby database engine and how to connect to the Sync application database in the AMI edition.
Warning: Modifying the application database directly may cause unexpected errors or data corruption if done incorrectly. Always back-up your database folder before making any changes, and if you need assistance, please contact [email protected]
Start the instance and then access the CLI:
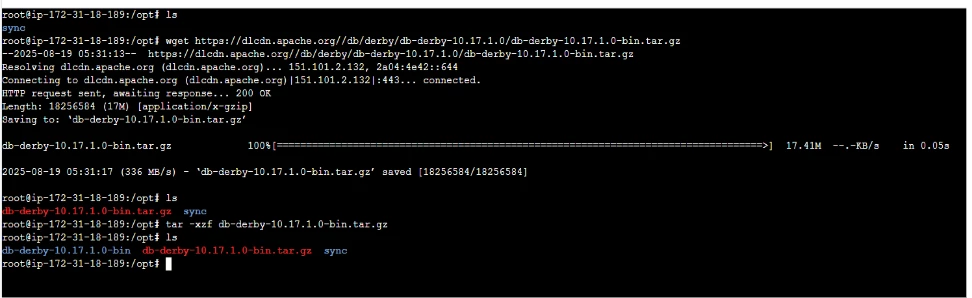
1. Download Derby binary using the following command in the opt directory:
wget https://dlcdn.apache.org//db/derby/db-derby-10.17.1.0/db-derby-10.17.1.0-bin.tar.gz
This will download the Apache Derby database engine (version 10.17.1.0).
2. Extract the archive:
tar -xzf db-derby-10.17.1.0-bin.tar.gz
Unpacks the Derby installation files.
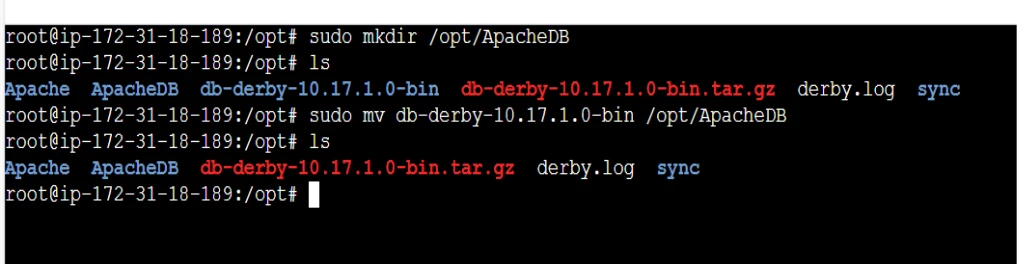
3. Create installation directory
sudo mkdir /opt/ApacheDB
Makes a directory `/opt/ApacheDB` to store the Derby binaries.
4. Move Derby into place
sudo mv db-derby-10.17.1.0-bin /opt/ApacheDB
Places Derby under `/opt/ApacheDB`.
5. Set environment variable:
export DERBY_HOME=/opt/ApacheDB/db-derby-10.17.1.0-bin

Points the environment to where Derby is installed, so you can run Derby tools.
6. Launch Derby interactive SQL tool (ij)
$DERBY_HOME/bin/ij
Starts Derby’s SQL shell (`ij`) to run SQL commands against a Derby database. The ij is a command-line tool that comes with Apache Derby.
Note: This version of Derby requires Java 19 or later. Please upgrade Java if you encounter an UnsupportedClassVersionError using the following command:
sudo apt update
sudo apt install openjdk-21-jdk-headless -y
7. Connect to CData Sync’s Derby DB
connect 'jdbc:derby:/opt/sync/db/cdata_sync';
This will connect to the Derby database, allowing you to run queries against it.

8. Example query:
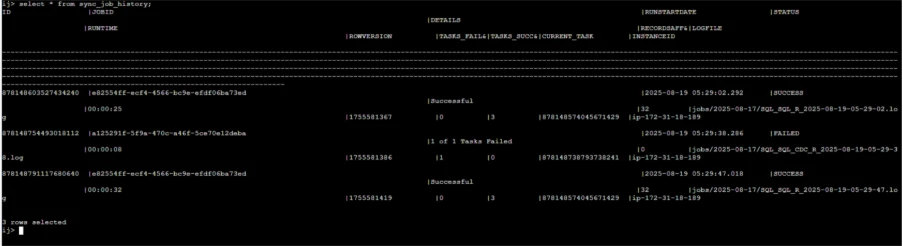
Select * from sync_job_history;