Dependent replication jobs can help you to improve the running time and system resource consumption for queries and views that are either often required or involve data sources with a huge amount of data (several millions of rows). In this article, we'll walk you through their implementation using an example based on the Adventure Works sample database. In this scenario, there are two data sources hosted on a MySQL server and we want to improve the performance of a simple join between two tables from these sources.
The guide is a step by step walkthrough and by no means complete. In the environment used for the explanation, there is a fresh setup of Data Virtuality Server and Studio with just the data warehouse connection and two data sources. If you are reading this and have an environment already in use with several data sources, materialized tables, and more, you will find some steps that you might skip (tables already materialized or replication jobs already existing and just needing some tweaking).
SELECT *
FROM "mysql_aw_two.product" Prod INNER JOIN "mysql_aw_one.purchaseorderdetail" Ord ON
        Prod.ProductID = Ord.ProductId
The product table and the purchaseorderdetail table reside on different data sources.
Please keep in mind that a join on two tables from the same data source could be done on the source server. Materializing one table but not the other one would almost certainly reduce the query performance. If the source server can be overburdened, then only materialize the finished join. Otherwise, materialize both tables and let the data warehouse perform the join.
After you've executed the select statement, your goal is to materialize the whole join with dependent replication jobs. To achieve this, do the following:
1. Find the query in the query tab and see the actual query plan. This is also useful if you want to optimize a query that has already been executed several times.
2. Find the tables involved:
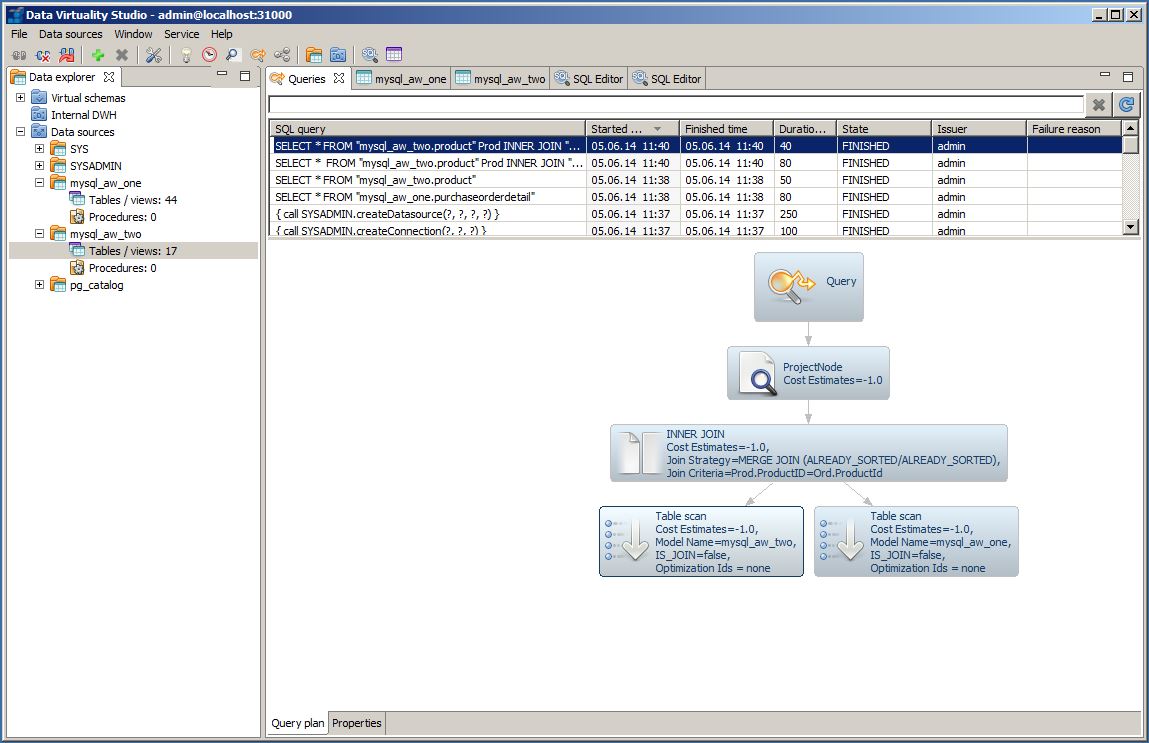
The screenshots in this guide are taken on a small environment. You may have to use filter in order to get to the desired query more quickly. You can then find out which tables are involved in two ways:
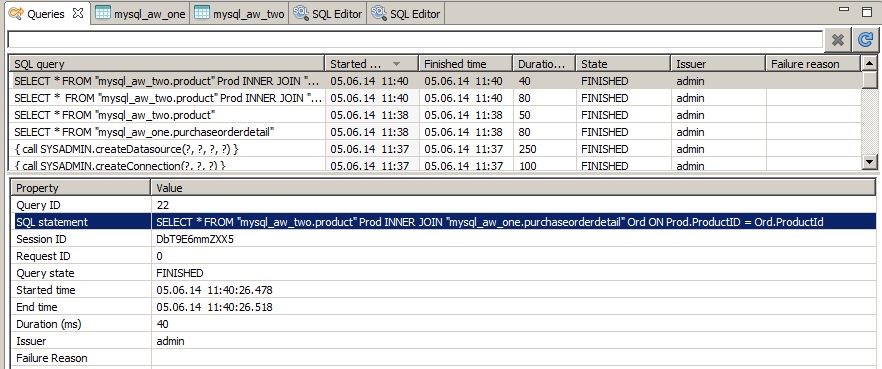
- Select the properties tab at the bottom:
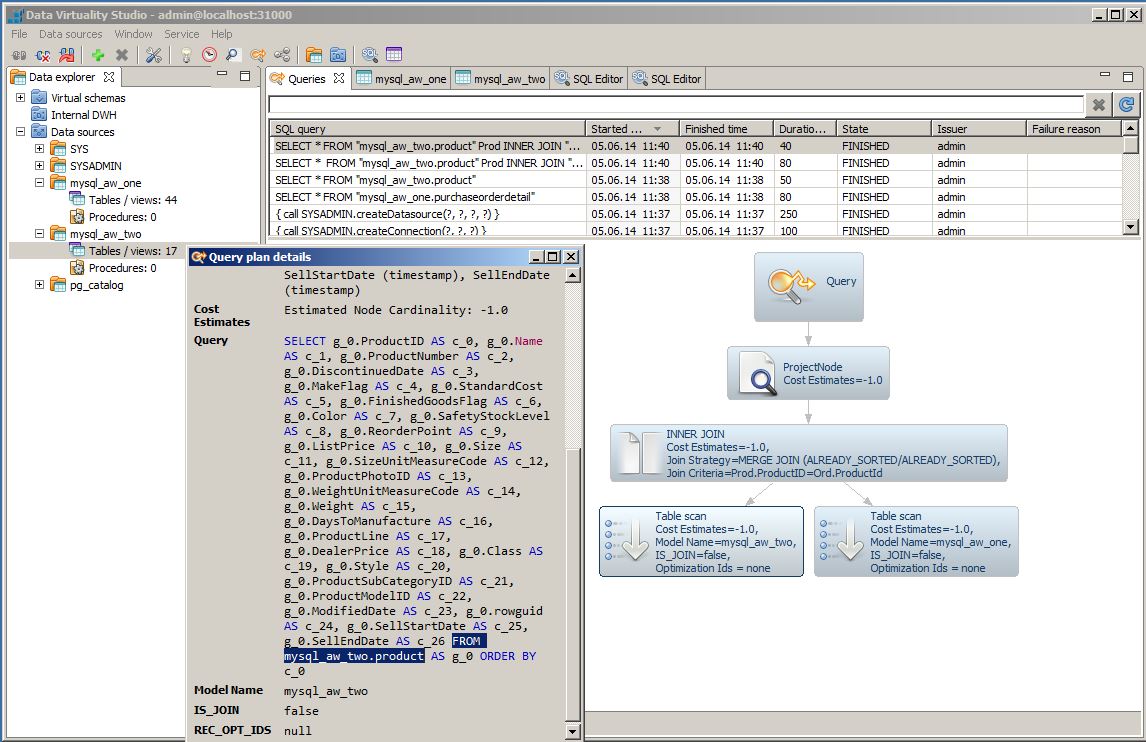
- Or double-click the table scan node from the graph and search through the query part:
When all the tables are identified, the simplest (but not always best!) approach is to order the tables bottom-up. Tables on the same level of the execution graph are equal and you can order them whichever way you like. This guide sorts the query parts as follows:
- mysql_aw_one.purchaseorderdetail
- mysql_aw_two.product
- INNER JOIN (mysql_aw_one.purchaseorderdetail, mysql_aw_two.product)
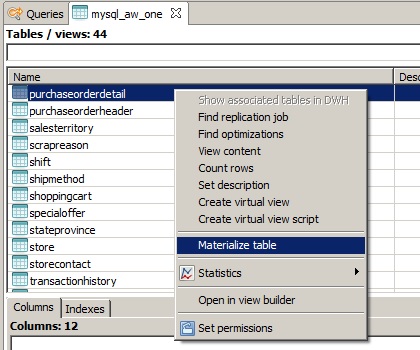
3. If the tables are not part of any optimization, you have to enable the materialization and create a replication job. You need to do this step and the following step repeatedly for the tables involved. Locate the table in the data source and enable the materialization. This guide will start with the table mysql_aw_one.purchaseorderdetail:
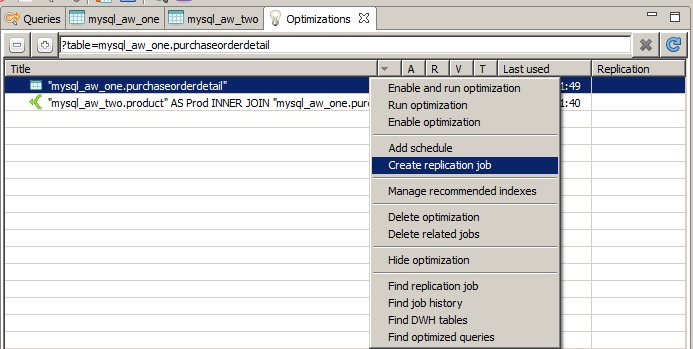
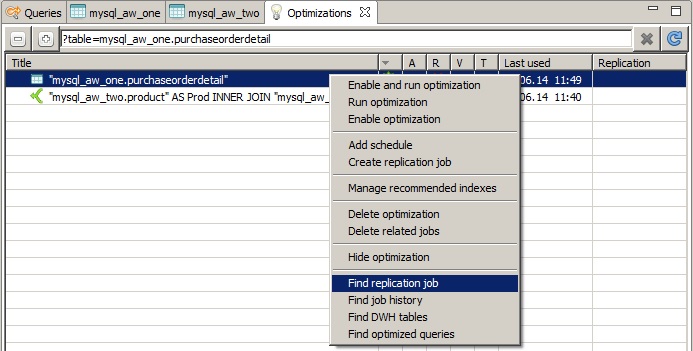
Now the table can be found in the optimizations tab. Alternatively, you can right-click on the table and select 'Find optimizations', which will immediately open the optimizations tab and filter for everything that contains this table.
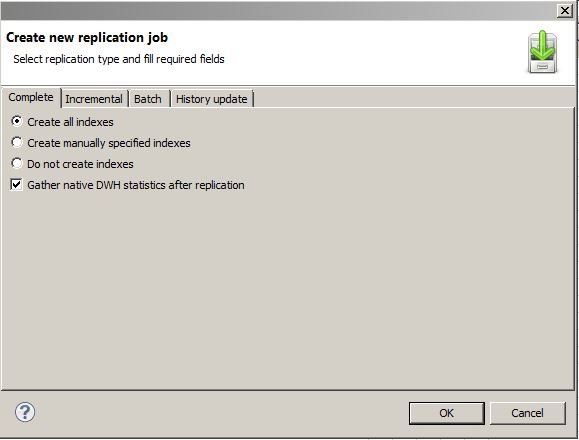
4. Now you can create a replication job with any desired configuration. For the purposes of this guide, we've decide to have the replication without any further modification from the default values. The replication job creation is achieved by selecting the entry from the optimizations tab which contains only the table itself (note the table symbol in the materialization type column). In the context menu, select the 'Create replication job' option:
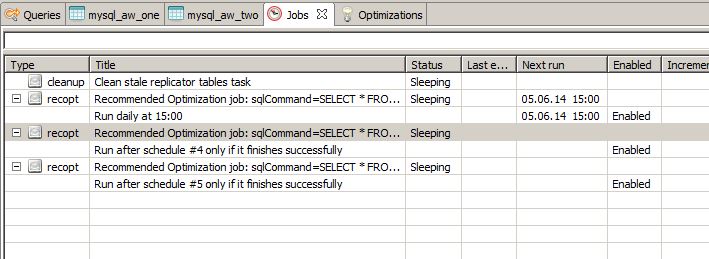
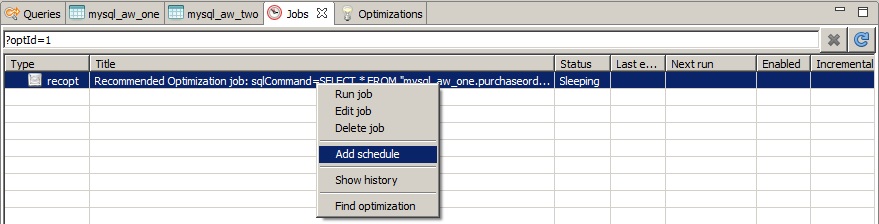
5. The next step is simple: find this replication job and add a schedule to it. Since the Data Virtuality Studio makes it easy to use, the following three screenshots should be self-explanatory:
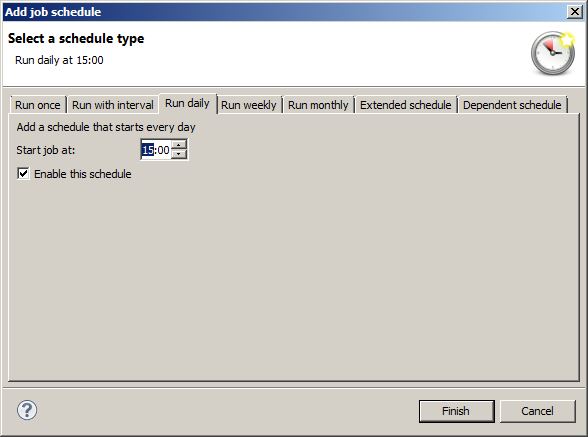
The selected schedule is just an example of what you can choose. But it is advisable to think about the scheduled jobs that are stored in the system. We recommend to try to minimize the number of parallel jobs. This is also true for jobs that are run sequentially but the preceding job takes too much time and will still be running when the next one has started. This is another reason why dependent jobs are such a useful means of optimizing the system's resource consumption.
6. Repeat Steps 3-4 for the next table (or expression, depending on the optimization you want to perform). The most interesting part is the schedule for the replication job (in this scenario, the replication job is for the table materialization of mysql_aw_two.product). When creating the schedule, select the tab labeled 'Dependent schedule'. Filter for the job you've just created (or already existing) and chose a specific schedule from the job - please note that one job may have several schedules. In this example, we've selected the job from the first table that was set to start at 15:00:
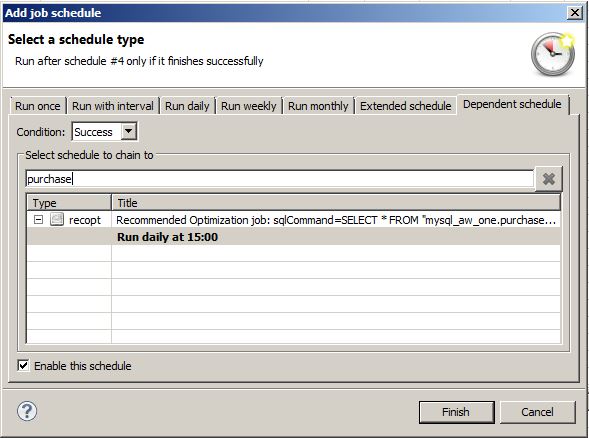
This concludes the schedule creation. This job will be automatically triggered after the selected job and schedule have run with the status finished. If the other job fails then this job will remain in sleep mode. Alternativey, you may set this schedule to run only, if the selected schedule fails. This is the major part of the whole guide. You can, of course, enable materialization of the tables first and you can set up the replication jobs without parallel schedules. But nevertheless, this is where you have to be very careful to mix up the schedules with the execution plan you have in mind. We encourage you to go through everything provided in this guide in order to have a clear order of this task.
You can now start again at Step 5, since the JOIN itself is found in the optimizations tab after the query was executed once. If you want to optimize your own queries and views, you might even have everything you need in the optimizations tab or you might even already have replication jobs that you can use. After you've created the three replication jobs with their according schedules, the job tab might look like this: