This document outlines the step-by-step process for generating a certificate within the QuickBooks Desktop Gateway (previously known as the Remote Connector) for QuickBooks Desktop.
The generated certificate is intended to enhance security and enable secure connections. Please follow the instructions below:
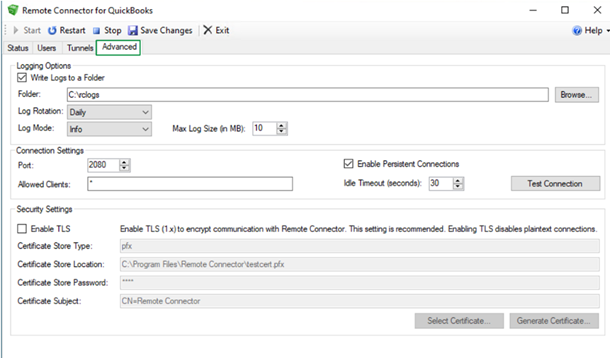
**Step 1: Launch QuickBooks Desktop Gateway and Access the Advanced Section**
-
Open the QuickBooks Desktop Gateway application on your QuickBooks Desktop computer.
-
Navigate to the "Advanced" section within the application.
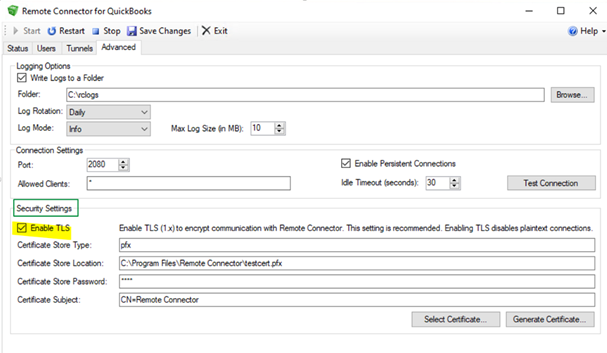
**Step 2: Activate TLS and Initiate Certificate Creation**
-
In the "Security Settings" section of the QuickBooks Desktop Gateway, activate the TLS (Transport Layer Security) option.
-
This action will initiate the creation of a new certificate.
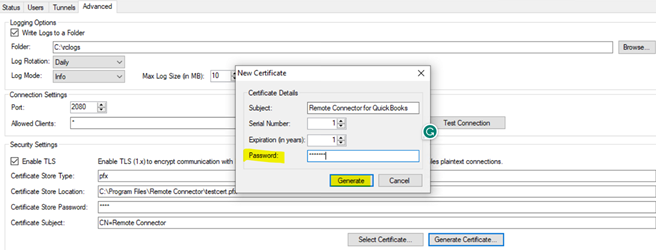
**Step 3: Set Password for Certificate Creation**
-
During the certificate creation process, you will be prompted to set a password.
-
This password enhances the security of the certificate that will be exported.
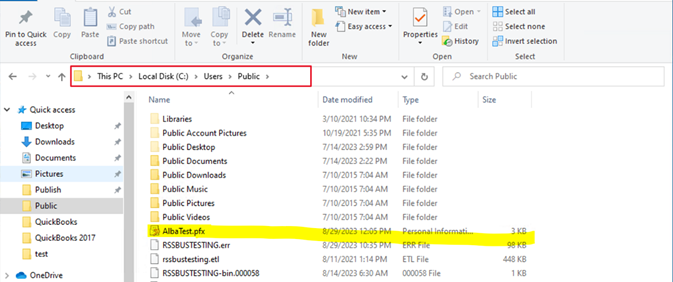
**Step 4: Place .pfx File in Accessible Public Path**
-
Save the newly created .pfx certificate file in a publicly accessible path where you have appropriate access.
-
Double-click the .pfx certificate file to store it on your local machine.
-
Follow the on-screen prompts and click "Next" to proceed.
-
Set a password for the Private Key protection.
**Certificate Extraction Methods: **
You have two distinct methods for extracting the .pfx file content. It's essential to note that the .pfx file contains both public and private keys, enabling secure connections and various functions outside your organization. On the other hand, a .cer file only contains the public key, which is commonly exchanged with integration partners. This section outlines the two extraction methods.
**Method 1: Adding Certificate to Trusted Root**
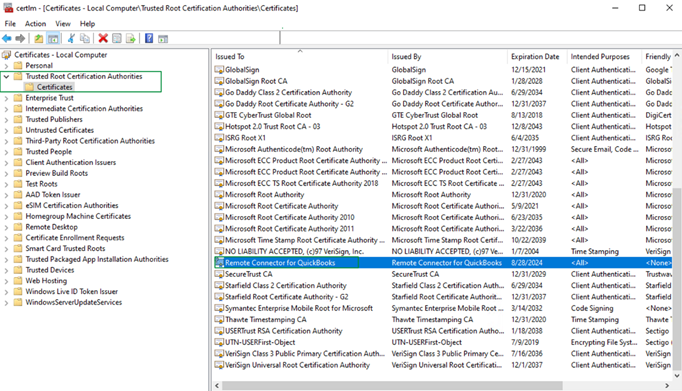
1. Add Certificate to Trusted Root Certification Authorities:
-
Import the generated certificate to "Trusted Root Certification Authorities."
-
Complete the import process to ensure a successful addition.

2. Access Manage Computer Certificates:
- Search for "Manage computer certificates" on your Windows system.
- Locate the "Trusted Root Certification Authorities" section.
- Right-click the certificate folder, choose "All Tasks," and select "Export."
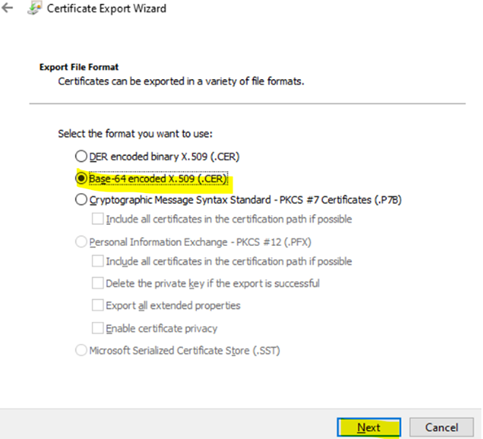
3. Export as Base-64 Encoded:
- During export, select the Base-64 encoded file format for certificate integrity.
- Click "Next," specify the desired certificate location, and complete the export process.
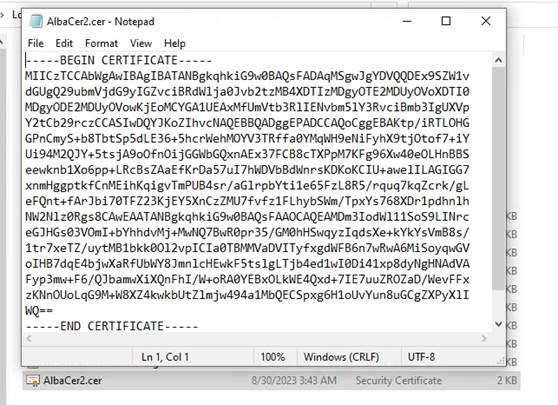
4. View Certificate:
- Open the exported certificate using a text editor to view its contents.
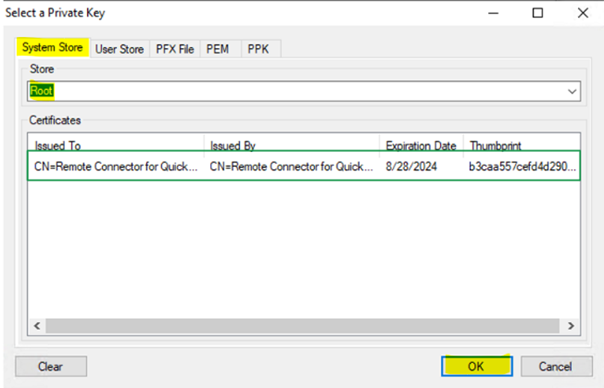
5. Select Certificates in the QuickBooks Desktop Gateway:
- In the "Advanced" tab of the remote connector, choose "Select Certificates."
- Under "System Store," select "Root," and choose the relevant certificate.
- Confirm your selection, save changes, and click "OK."
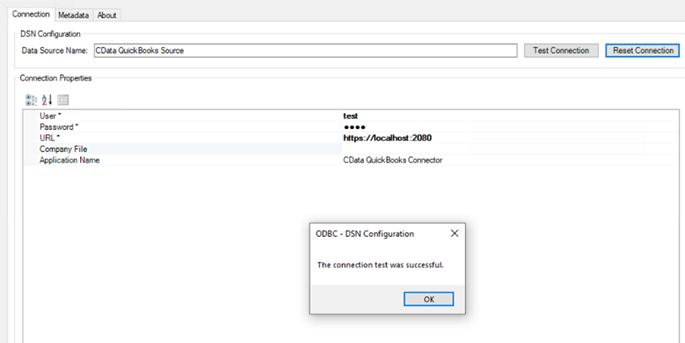
6. Configure Local ODBC Connection:
- Configure your local ODBC Connection to utilize the URL (replace the Port in the URL with the value you set under the Advanced tab in the Gateway config): https://localhost:2080.
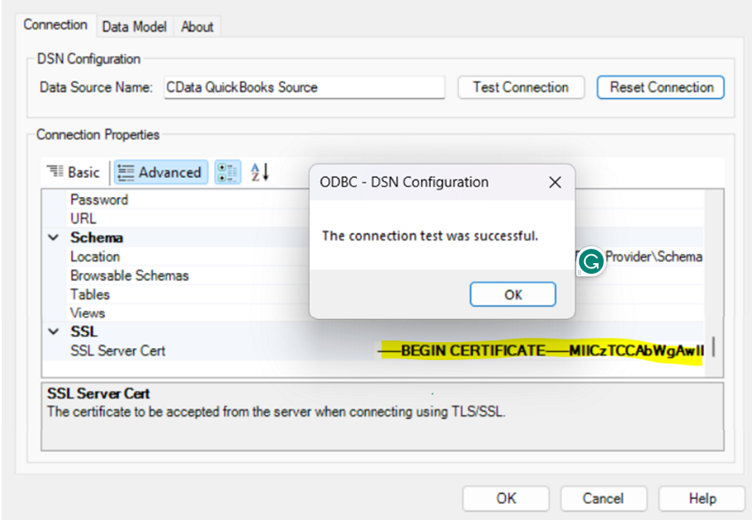
7. Transfer Certificate and SSLServerCert Configuration:
- If transferring the certificate, export the certificate file and add the certificate code to SSLServerCert configuration.
**Method 2: Using OpenSSL to Export the .pfx File**
1. Use Open SSL to export the. pfx file:
Firstly, check if OpenSSL is downloaded in your PC. In the command prompt type “openssl version” to verify if this is installed. In case you do not have it installed on your pc you can download it form the link below:
https://slproweb.com/products/Win32OpenSSL.html
2.Once installed go to the .pfx file directory and add the following code:
openssl pkcs12 -in InputFile.pfx -clcerts -nokeys -out OutputFile.cer
Note: replace ”InputFile” and ”OutputFile” with the names you wish to use.

Set the Password and click enter. Note that the password will not show in the command prompt while typing. If everything is done correctly you will see that in the same directory where the .pfx file is the .cer file will be generated.
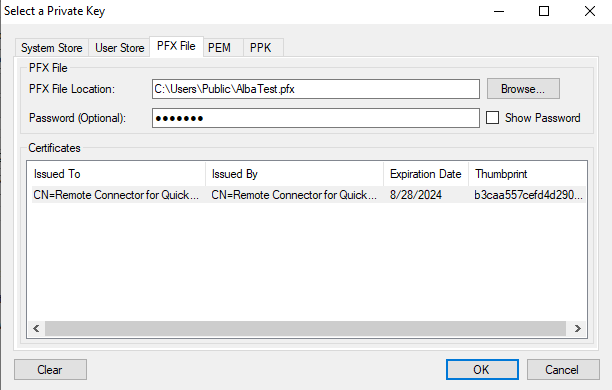
Please be aware that within the QuickBooks Desktop Gateway, if you opt for the second method, select the "PFX File" option when prompted to choose a certificate. Set the file location accordingly, and then click "OK" to finalize the process.