There has often been confusion regarding how to set up the QuickBooks Desktop Gateway to use with CData products. This KB entry provides screenshots and additional context for setting up a user using the Remote Connector:
-
Download the CData driver you are using directly from our website onto the computer where you wish to access the data from QuickBooks.
-
Download and install the latest version of the CData QuickBooks Desktop Gateway to the computer where QB Desktop is installed: https://www.cdata.com/products/quickbooksgateway/
-
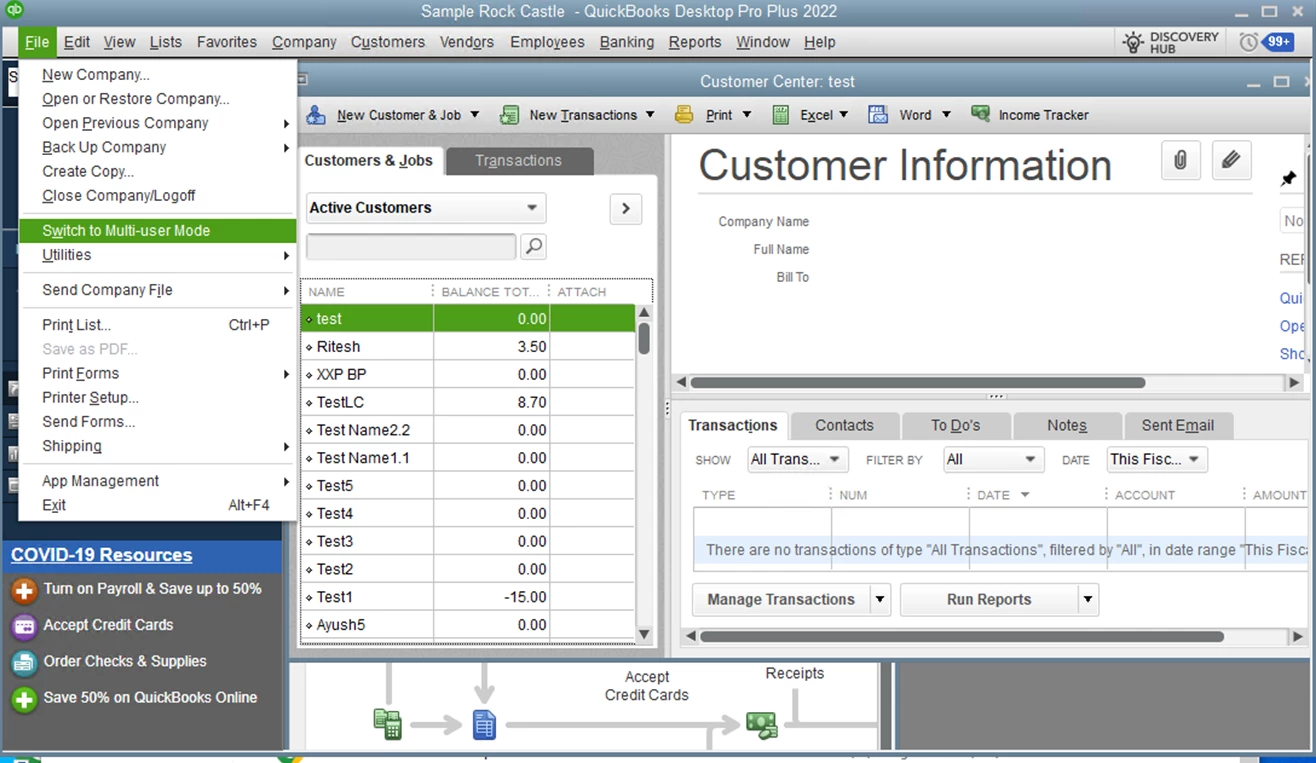
Start the QB Desktop application and open a single file that you wish to connect to. Under ‘File’, make sure that QB is in Single-user Mode:
-
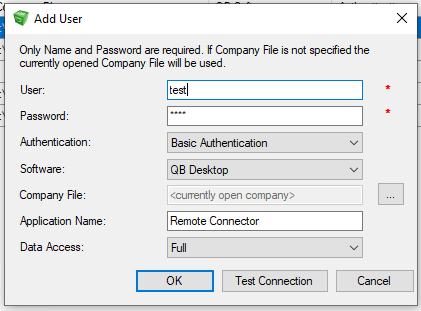
Switch to the CData Desktop Gateway and navigate to the “Users” tab. Click “Add…” to add a user:
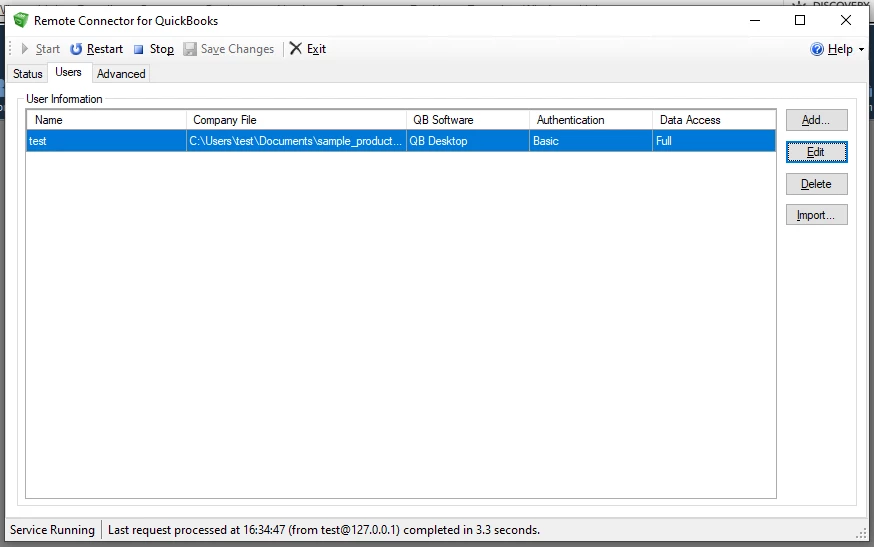
-
Select any username for the “User” field and any password for the “Password” field. These values are not related to the username and password your currently open company file might have. Leave the “Company File” field blank to have the user authenticate with the currently open file in the QB Desktop Application. Click “Test Connection” to initiate the authorization of the newly created user and the currently open company file.
Example- (test / test)
-
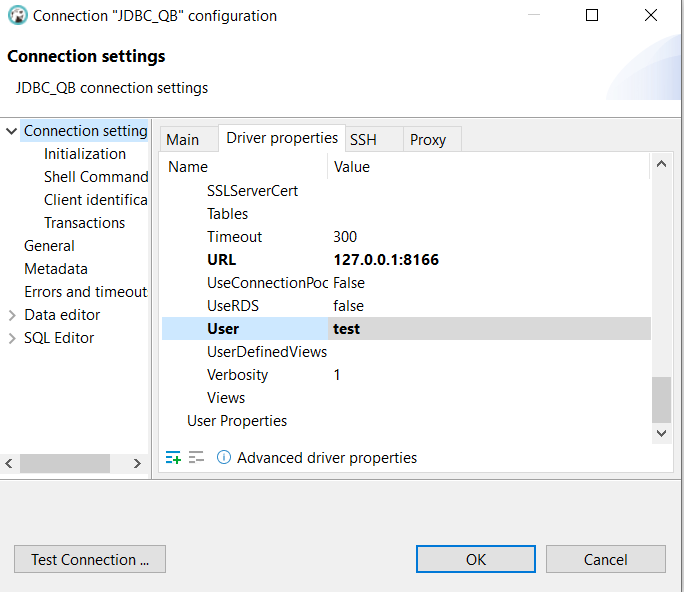
Switch to the CData QB driver located on the computer you want to access data from and edit the connection properties for this QB driver - the process to edit the connection properties will differ based on the tool you are using with the CData driver. The Screenshot below uses DBeaver with our CData JDBC QuickBooks driver.
Please navigate to the help documentation located in the installation directory of your downloaded CData driver and expand the “Connection String Options” tab to learn more about the connection properties of the specific driver edition you are using (i.e., ODBC, JDBC, SSIS, etc.). Example: https://cdn.cdata.com/help/RQJ/jdbc/Connection.htm.
-
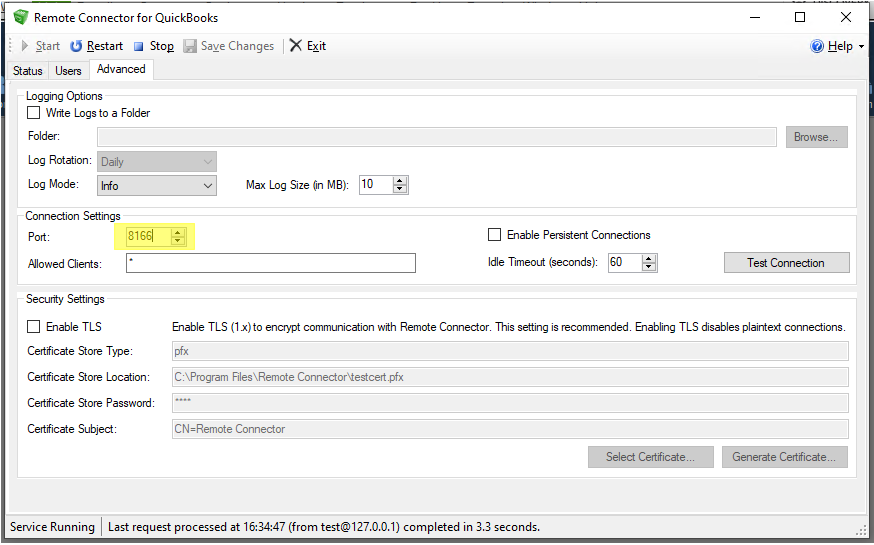
In the connection, set the “URL” parameter to the following format: <IP of Computer with the Remote Connector>:<Port of the Remote Connector – given from the “Connection Settings” section of the “Advanced” tab – See Below>.
Example URL format: 255.255.255.255:1234
Set the “User” parameter to the exact same “User” given when creating that new user in the CData Desktop Gateway application.
Example User format: same_user_from_CData_Desktop_Gateway
Finalize the changes you made to the connection string. For DBeaver, click “Test Connection” and click “OK”.
-
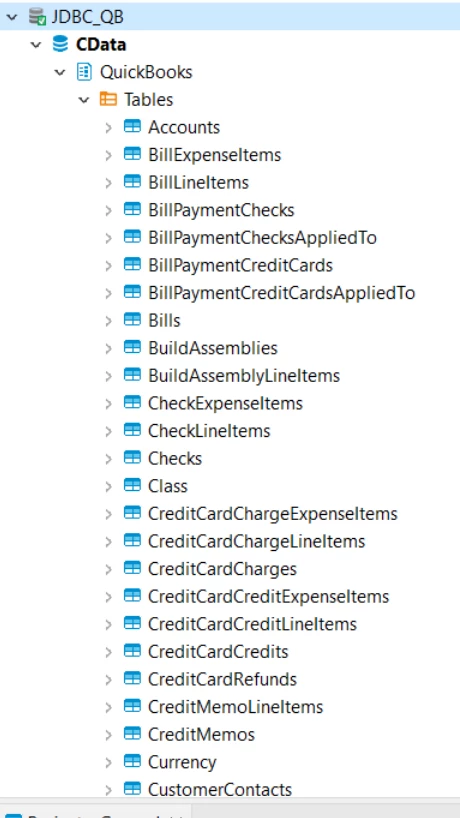
You should now be able to access the data of that connected QB file: