Apache Tomcat is a popular free and open-source web container and webserver to serve Java-based web apps or pages.
-
Download Tomcat server’s latest edition Zip file from https://tomcat.apache.org/ and extract the files to a particular folder(64bit or 32 bit as per requirement).
-
Install the Java edition of CData Sync from our website and place it in some folder.
-
Copy sync.war and services.war file from the specified path (C:\ProgramFiles\CData\java sync\webapp) and paste it inside the tomcat folder at specific path (D:\apache-tomcat-9.0.68-windows-x64\apache-tomcat-9.0.68\webapps) .
-
Navigate to the conf sub-directory within the extracted directory and locate the server.xml file. The default connection port is 8080. To choose a different port, edit the server.xml (ex: tomcat\conf\server.xml) file with a text editor, such as Notepad++, and locate the following lines:
<Connector port="8080" protocol="HTTP/1.1"
connectionTimeout="20000"
redirectPort="8443" />
Change the connector port number to any number between 1024 and 65535(If needed).
-
Again, visit conf sub directory and locate tomcat.users.xml file .
Create user for Tomcat and provide the necessary details.
<user username=”admin” password=”Admin123@” roles=”manager-gui”/>
Configure the Java Authentication and Service(JAAS)
To enable Sync to manage users dynamically within the application, you must configure the JAAS as described in the following subsections.
Create the Login Module
-
Create a JAAS configuration file with the name jaas.config in this folder: $tomcat/conf/.
-
Include the following content in the jaas.config to use standard authentication:
Sync{sync.LoginModule required;};
Create (or Modify) the JAASRealm Module
-
Create a context for Sync by creating (or modifying, if it is present) the configuration XML file that is located here:
D:\apache-tomcat-9.0.68-windows-x64\apache-tomcat-9.0.68\conf\Catalina\localhost\sync.xml
Note: Depending on how Tomcat is configured, this path might be slightly different. In this example, Catalina refers to the engine name, and localhost is the hostname that is defined in server.xml.
-
Define a <Context> block and add an <Realm> element as shown below:
<Context>
<Realm className="org.apache.catalina.realm.JAASRealm" appName="Sync"
userClassNames="sync.SimplePrincipal"
roleClassNames="sync.GroupPrincipal" />
</Context>
-
Then, update the <Host> element in the server.xml configuration file for the Tomcat server by setting the copyXML attribute to true, as shown below:
<Host name="localhost" appBase="webapps" unpackWARS="true" autoDeploy="true" copyXML="true">
...
</Host>
Make the Login Module Visible
-
The Java virtual machine (JVM) must be directed to the login module (jaas.config) for the configuration to be visible. Set the java.security.auth.login.config system property on the JVM to the path of the jaas.config file. To do so, append the following line to
D:\apache-tomcat-9.0.68-windows-x64\apache-tomcat-9.0.68\conf\catalina.properties file:
java.security.auth.login.config=${catalina.base}/conf/jaas.config
-
Customize your app directory(In my case its under D:/Tomcat) for the application within the server.xml file for the Tomcat server:
<Context path="sync">
<Parameter name="APP_DIRECTORY" value="D:\Tomcat" override="false"/>
<Realm className="org.apache.catalina.realm.JAASRealm" appName="Sync"
userClassNames="sync.SimplePrincipal"
roleClassNames="sync.GroupPrincipal" />
</Context>
Restart Before Starting the Application
Start the application
-
Navigate to the tomcat/bin folder, go to File open the directory with the PowerShell:
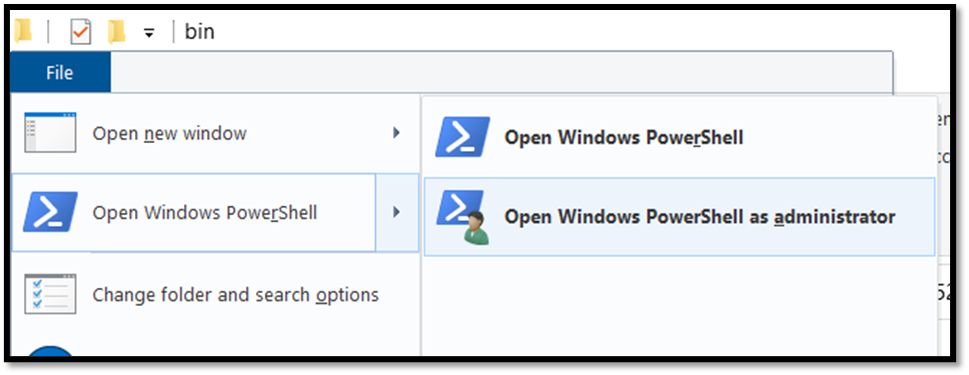
-
Enter the command to start the tomcat server:
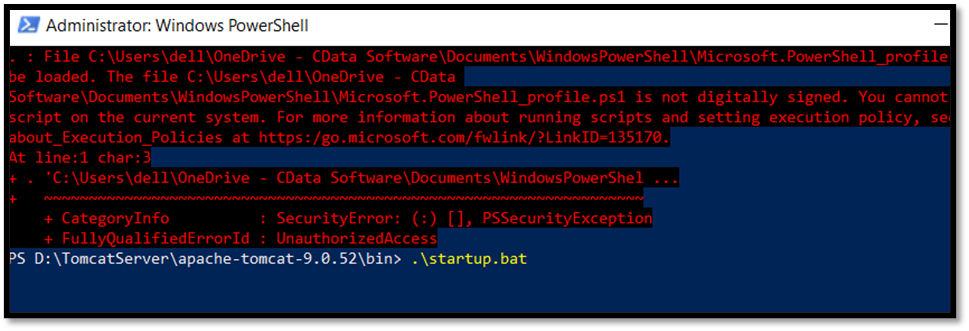
-
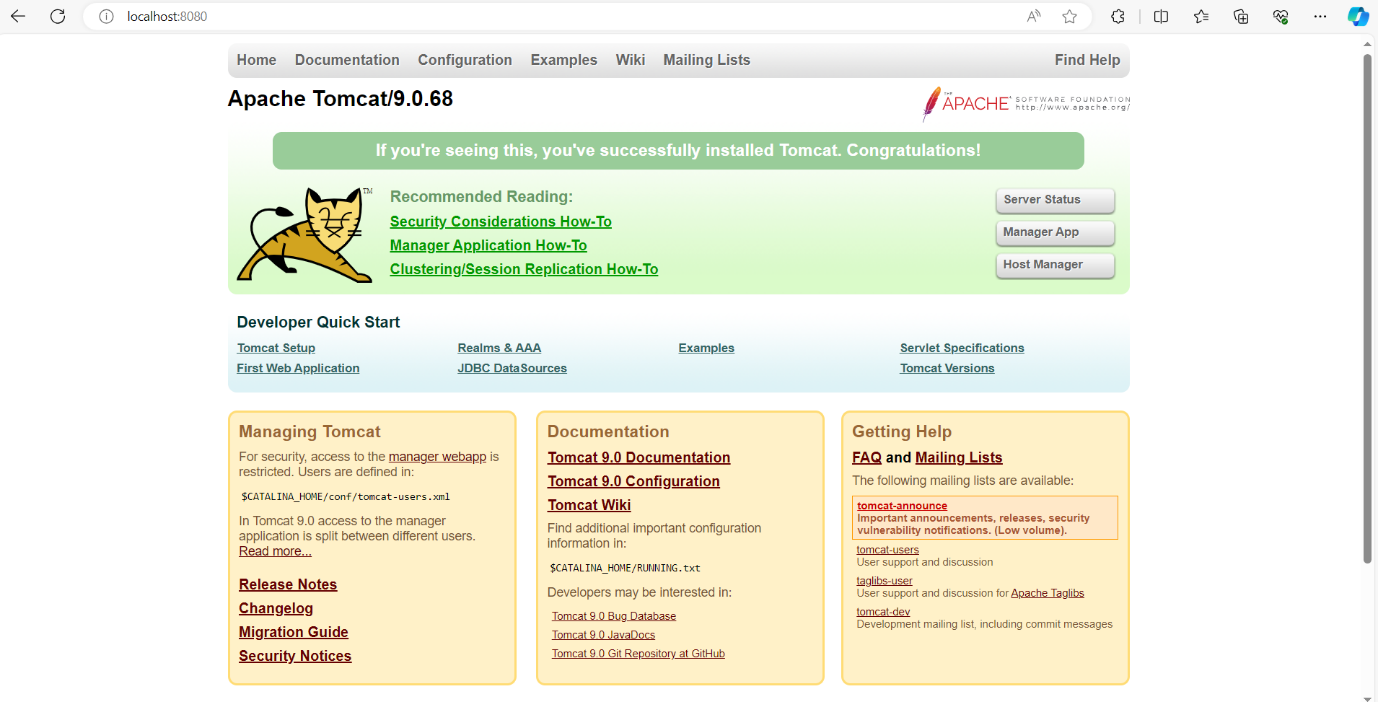
The new terminal will start initializing the Sync application. Then go to any browser and enter localhost:8080(the Port may differ based on the server.xml). for the first time, it will ask to create a new user. Enter details and log in to the application.
-
Now you can navigate to the app directory to see whether the database is created or not. In my case, it is under D:\Tomcat.

-
To shutdown the server:

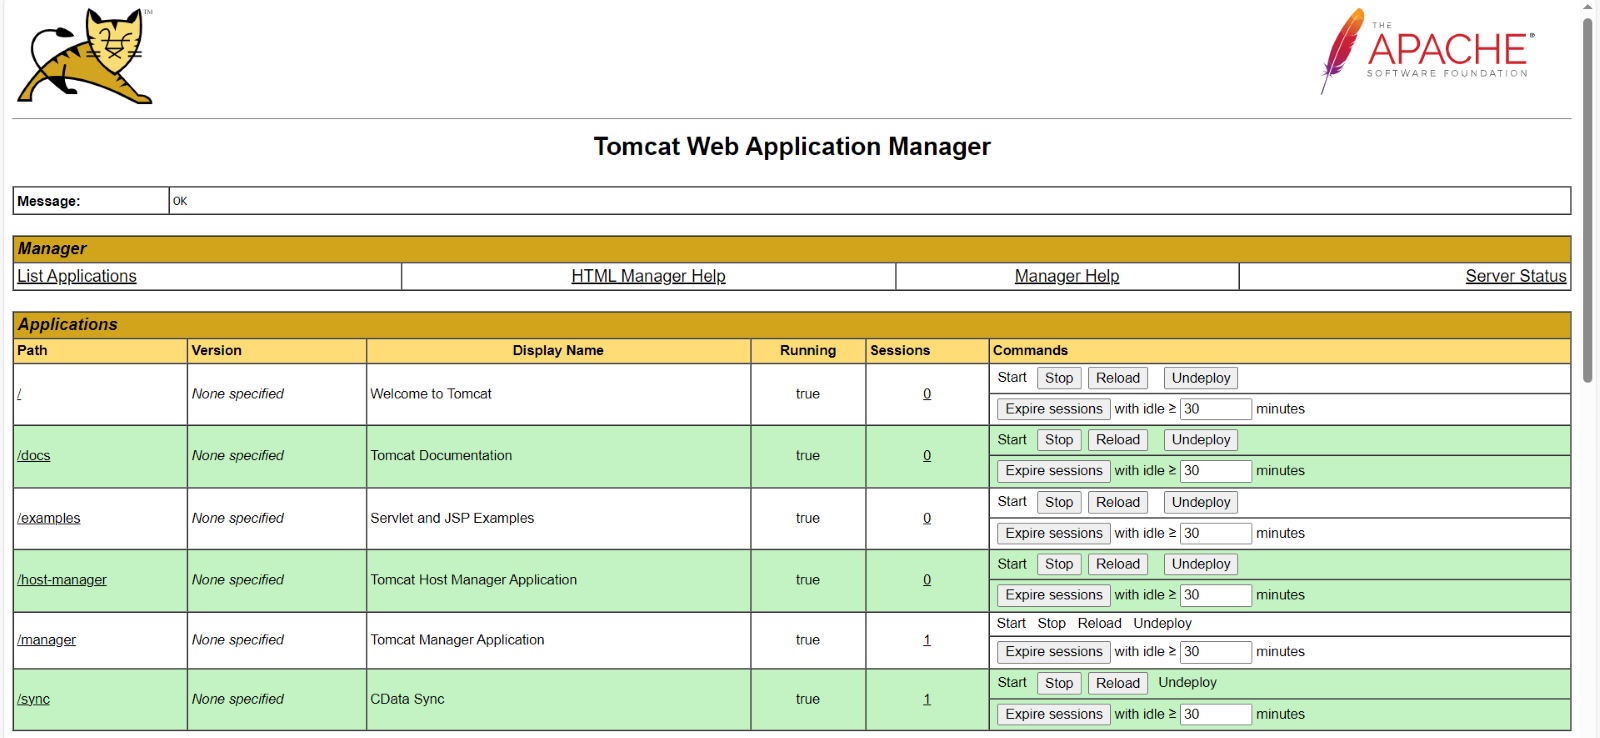
Now run the server on localhost:8080 (port which you specified in the server.xml file.
Login with your username and password.
Go to Manager Apps.