Query Users (Connect Cloud users with permissions to query connections, but not manage them) can inject their own credentials into connections. Administrators can configure Connections to use Shared Credentials or User Credentials. The User Credentials option requires users to supply their unique log-in information.
Why user-defined credentials matter
Different business users often need access to different sets of data based on their own service permissions. User-defined credentials mean that IT teams can extend the security and permissions of their disparate data platforms to CData Connect Cloud, meaning each stakeholder in an organization has access to exactly the data they need. For example:
- A data scientist can use their own Snowflake credentials to authenticate and build reports without the risk of including data outside of the scope of their report
- A business development representative can use their own Salesforce credentials to authenticate and only pull leads for their territory for an email campaign
- An Human Resources representative can use their own Workday credentials to authenticate and ensure the reports they build only use data from their predefined datasets (built in Workday’s Prism Analytics) that already mask personally-identifiable information (PII), ensuring the privacy of their employees
In this article, we guide you through creating a connection with User-Defined Credentials for Snowflake. The Connect Cloud admin user will create a connection using a Snowflake account with the SYSADMIN role. A separate Connect Cloud query user will create a connection using a Snowflake account with the PUBLIC role.
Implementing user-defined credentials in the Admin Snowflake connection
Snowflake is one of the CData Connect Cloud data sources that is enabled for user-defined credentials. First, you'll need to create a connection to Snowflake using a Connect Cloud account with Admin permissions to create the primary Snowflake connection.
- Log-in to Connect Cloud and navigate to the Connections page.
- Click Add Connection and select Snowflake (or select an existing Snowflake connection).
- Set the following properties in the Authentication section
- URL - the URL of your Snowflake database
- Warehouse - the name of Snowflake warehouse
- Auth Scheme - select the authentication scheme you wish to use across all users
- Leave the actual credentials blank at this point
- Optionally set Database and Schema - the initial database and schema to use when connecting to Snowflake

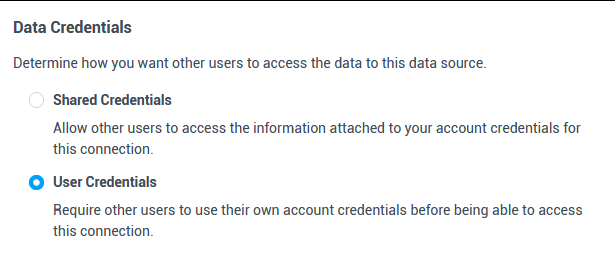
- In the Data Credentials section, select User Credentials.
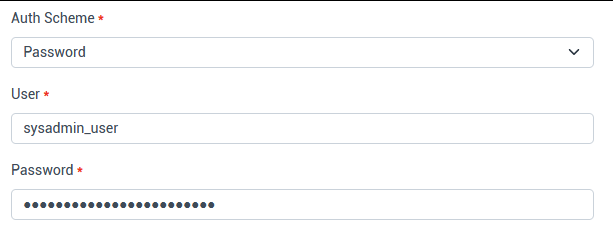
- After selecting User Credentials, complete the authentication for the Admin user, based on the Auth Scheme you selected.
For this article, we enter the username and password. - Click Save & Test to finalize the configuration.
Implementing user-defined credentials in the Query Snowflake connection
With a primary connection configured by an Admin user, Query users can configure connections using their own Snowflake account.
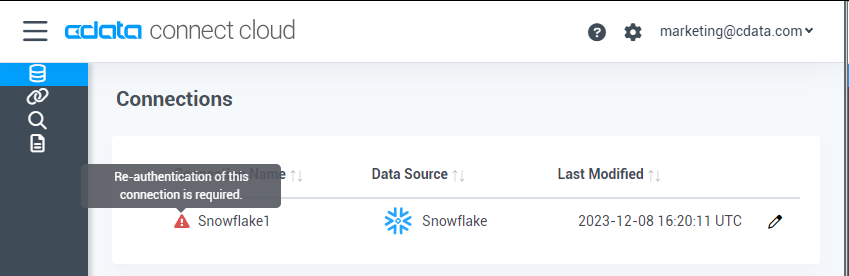
- Log-in to CData Connect Cloud and navigate to the Connections page.
- Select the Snowflake connection (note the warning icon indicating that re-authentication is required).
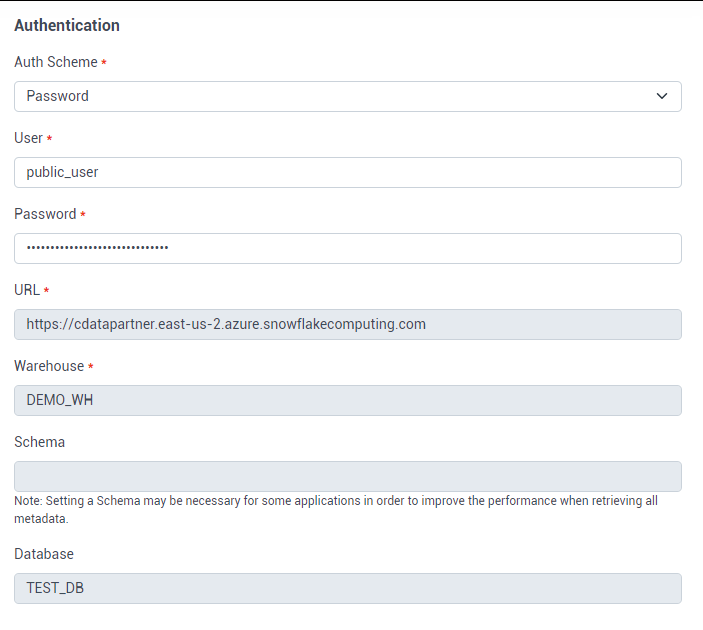
- Enter the credentials for the Query user. This will be a different set of credentials, with different permissions from our Admin user.
Note that the shared properties (URL, Warehouse, Database, and Schema) are pre-filled and disabled for the Query user. - Click Save & Test to finalize the configuration.
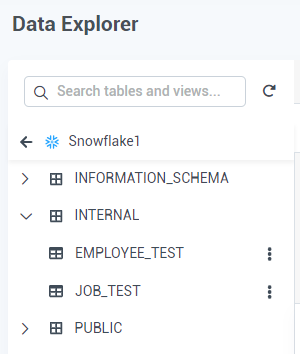
Seeing the difference
To see the difference made by connecting with different users, we can simply use the Data Explorer in Connect Cloud. You will see a different data model in the Data Explorer for the Snowflake connection, depending on which user is logged in. In this article, the Admin user has permissions for the "INTERNAL" schema in the "TEST_DB" database, while the Query user does not.
Admin User | Query User |

At this point, your Connect Cloud users have access to Snowflake data based on their own Snowflake account permissions. IT admins can control access to data directly from Connect Cloud and business users will get access to the same data they're used to when connecting directly to the platform.
Free trial & more information
To learn more about CData Connect Cloud and get live access to your Snowflake data (plus hundreds of other SaaS, Big Data, and NoSQL sources) while leveraging the same user permissions you're used to, visit our CData CData Connect Cloud page or sign up for a free trial today!