In cloud computing, managing databases efficiently and securely is paramount. One such method involves creating an Amazon RDS instance for PostgreSQL using IAM Authentication. This process allows users to leverage the robustness of PostgreSQL databases while ensuring secure access through AWS’s Identity and Access Management (IAM) system. This approach enhances security and simplifies database management, making it an attractive option for businesses and developers alike.
CData Sync simplifies the process of replicating data into your RDS PostgreSQL instance while adhering to the security best practices of IAM authentication. Meanwhile, CData Drivers ensure that your applications can communicate seamlessly with this database, allowing you to read, write, and update data.
In the upcoming sections, we’ll explore a step-by-step guide for configuring an RDS instance for PostgreSQL using IAM Authentication:
- Creating the RDS Instance
- Creating the PostgreSQL user in pgAdmin.
- Creating an IAM role
- Configuration of PostgreSQL in Sync and Drivers
Step 1: Creating the RDS Instance
This is the first step where an Amazon RDS instance for PostgreSQL is set up in AWS. The RDS instance acts as your database on the cloud, which can be accessed and managed remotely.
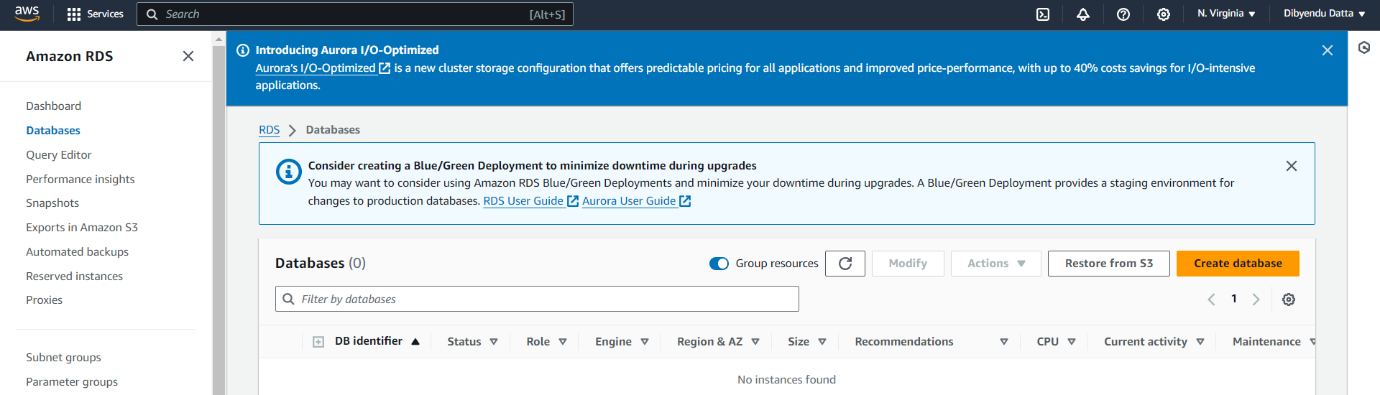
- Log in to your AWS instance, then navigate to RDS. Once there, open the Databases section and click on ‘Create Database’.
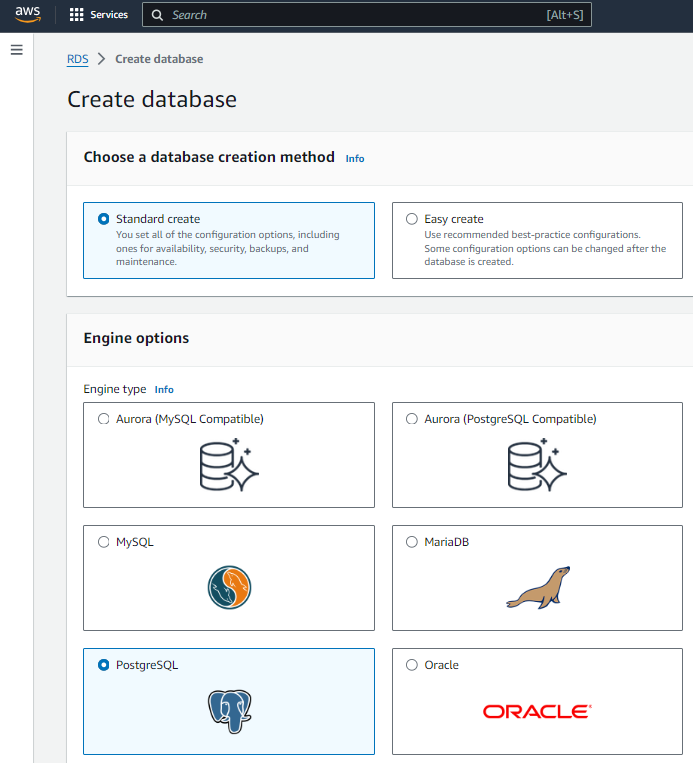
- Configure the Databases with the following properties:
- Select the ‘Standard’ database creation method.
- Choose the ‘PostgreSQL’ engine option.
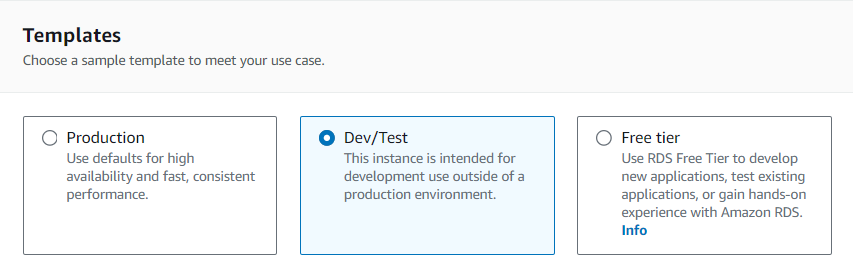
- Choose either the Dev/Test template or the Free Tier template, depending on the cost.
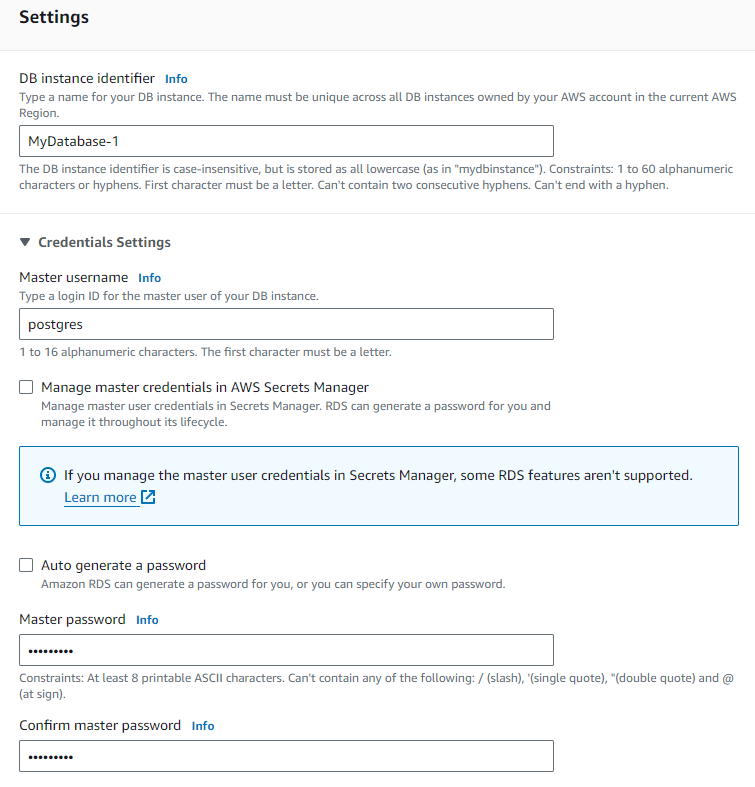
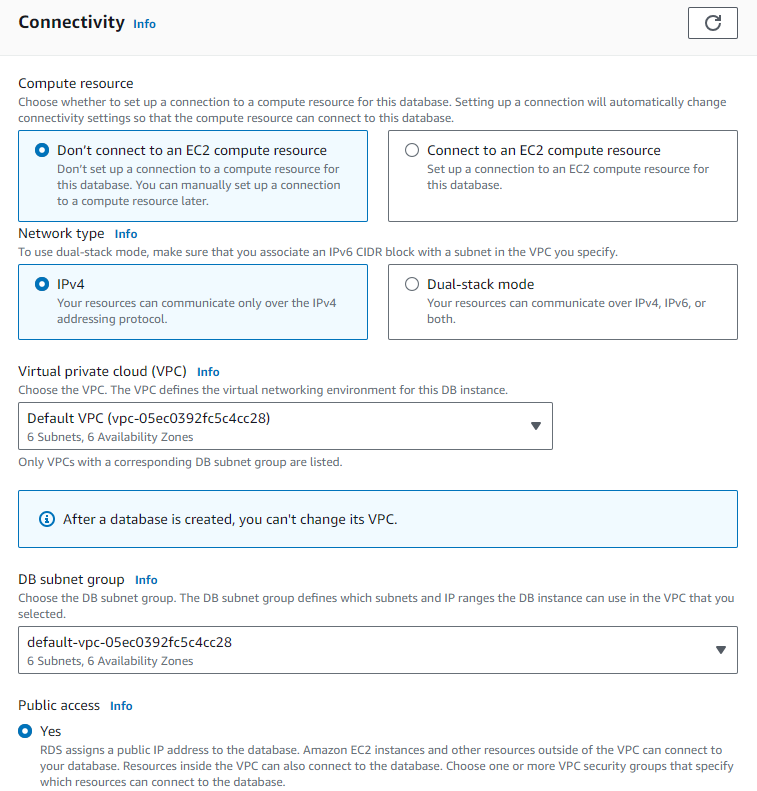
- Configure the Settings to:
- DB instance identifier: Name your RDS instance
- Master username: Name your database
- Master password: Choose the password for your database
- Confirm master password
- Connectivity: Public access: Yes
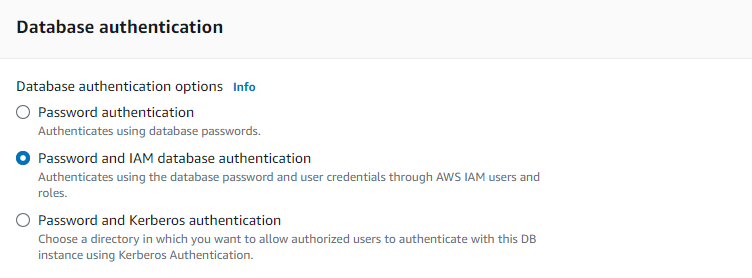
- Database Authentication: Database and IAM database authentication
- Create the database by configuring the above properties.

Step 2: Creating the PostgreSQL user in pgAdmin
pgAdmin is a popular open-source and full-featured PostgreSQL administration tool. In this section, a new PostgreSQL user is created who will have the rights to perform certain database operations.
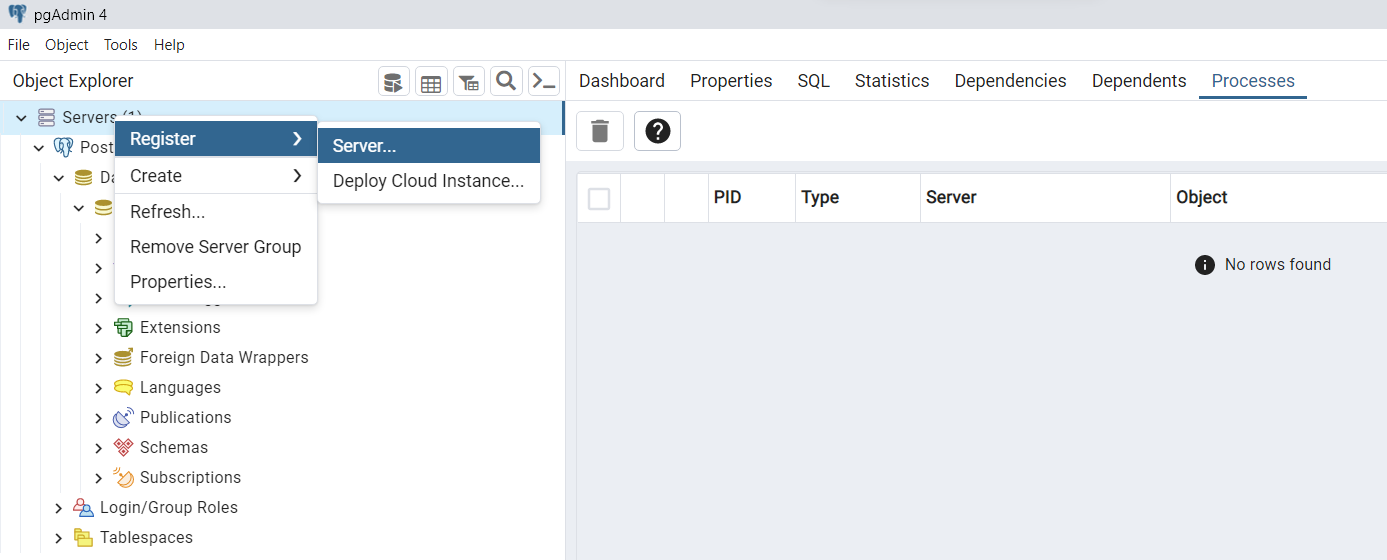
- In PostgreSQL, right-click on ‘Servers’. Then, navigate to and click on Register > Server.
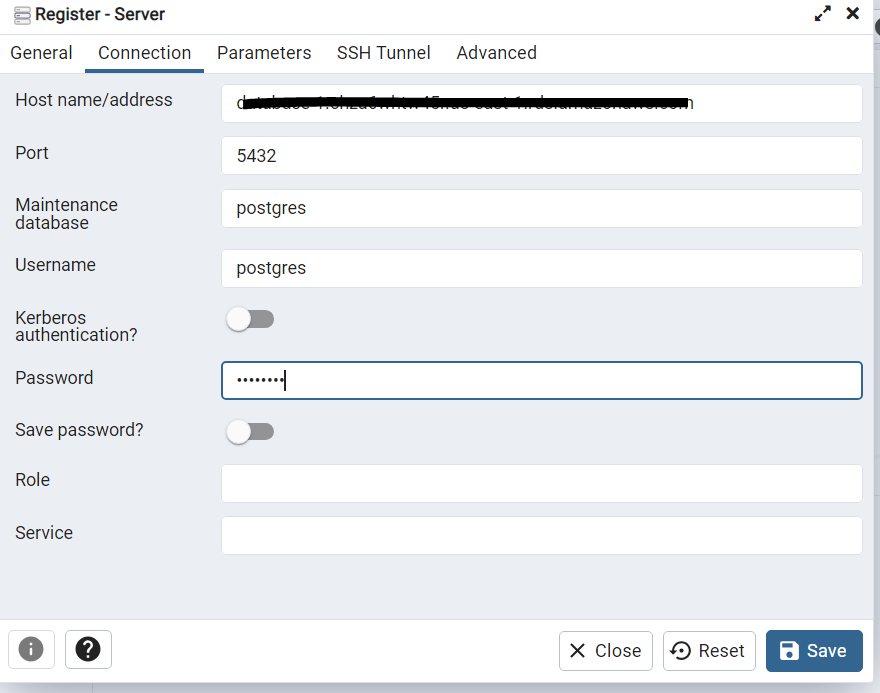
- Configure the RDS instance of PostgreSQL in the database console.
- Create the PostgreSQL user by executing the following script:
CREATE USER db_user WITH LOGIN; - Grant RDS access to the user with the command:
GRANT rds_iam TO db_user;
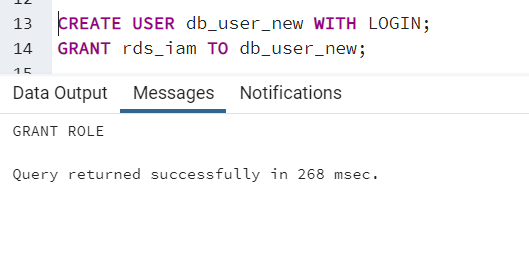
Note: Remember that db_user represents the username you’ve created for PostgreSQL.
Step 3: Creating an IAM role
IAM (Identity and Access Management) is a service offered by AWS that helps control access to AWS resources. An IAM role is an entity that defines a set of permissions for making AWS service requests. Here, an IAM role is created to manage permissions and control access to the PostgreSQL database.
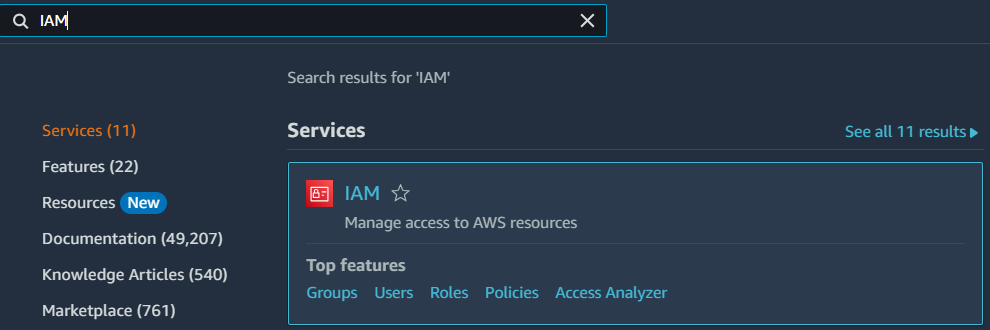
- Log in to the AWS portal, then search for IAM Roles and click on ‘Create Role’.
- Configure the IAM Roles with the following settings:
- Select ‘AWS Account’ as the Trusted Entity type
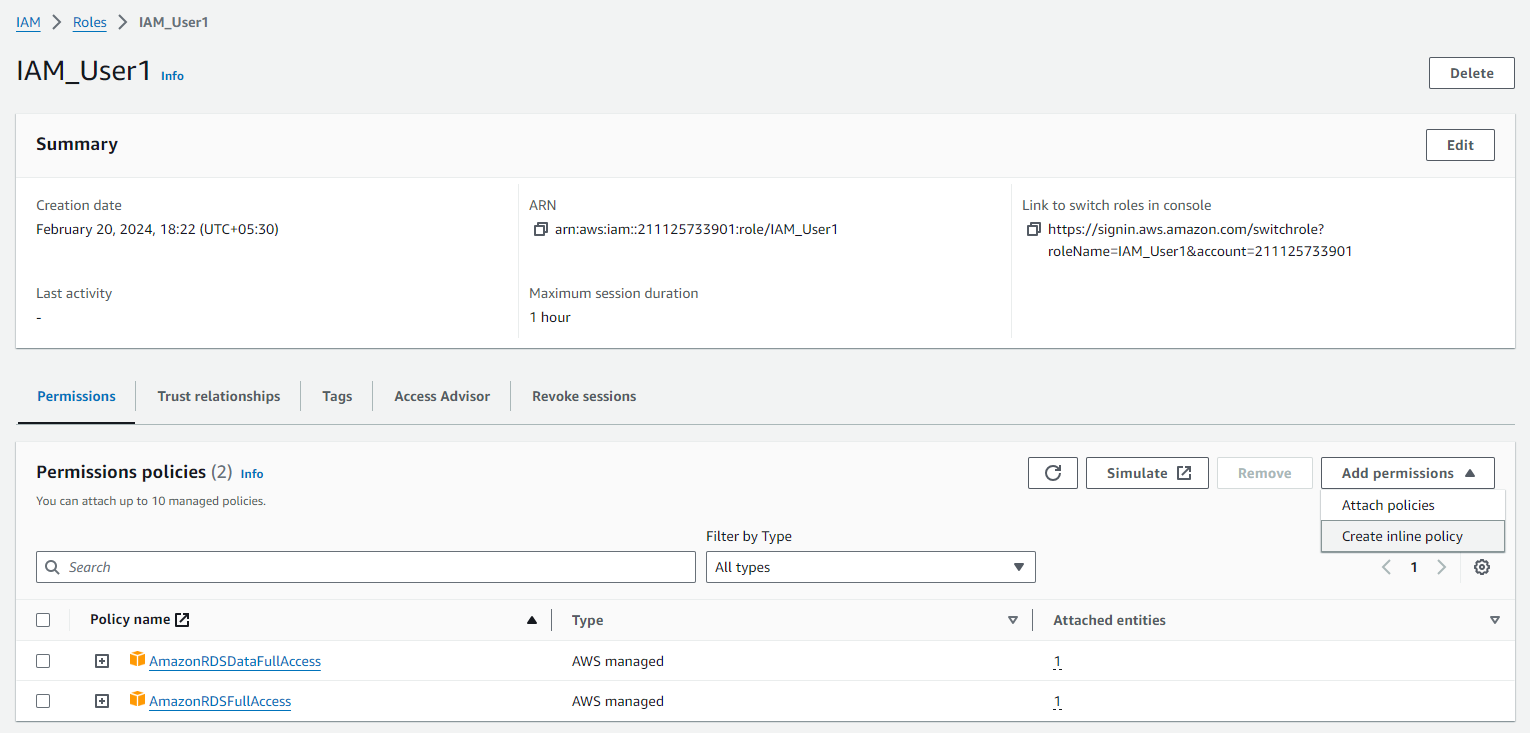
- Choose the following Permission Policies:
- AmazonRDSFullAccess
- AmazonRDSDataFullAccess
- Provide the role name and create the role
- In the Permissions tab, click on ‘Add Permissions’ and create an Inline Policy
- In ‘Specify permissions,’ pass the following JSON:
{
   "Version": "2012-10-17",
   "Statement": [
      {
         "Sid": "VisualEditor0",
         "Effect": "Allow",
         "Action": "rds-db:connect",
         "Resource": "<rds arn>:<rds resource id>/<postgresql user created in part 2>"
      }
   ]
}Note: RDS ARN and RDS Resource ID can be fetched from PostgreSQL RDS instance configuration
- After creating the Inline Policy, please configure the Trust relationships.
Note: Add one more tag in your trust relationships which is AWS and enter your User ARN

Step 4: Configuration of PostgreSQL in CData Sync and CData Drivers
CData Sync is a universal data pipeline that delivers automated continuous replication for a wide range of databases, CRMs, ERPs, and APIs. CData Drivers are universal data connectors that offer seamless integration with a wide range of data-driven applications and platforms. In this step, the PostgreSQL database is configured to work with CData Sync and CData Drivers. This ensures smooth data synchronization and seamless integration between your applications and the database.
- Log in to the Sync Application, then navigate to the ‘Connections’ tab.
- Click on ‘Add Connection’ and configure your PostgreSQL
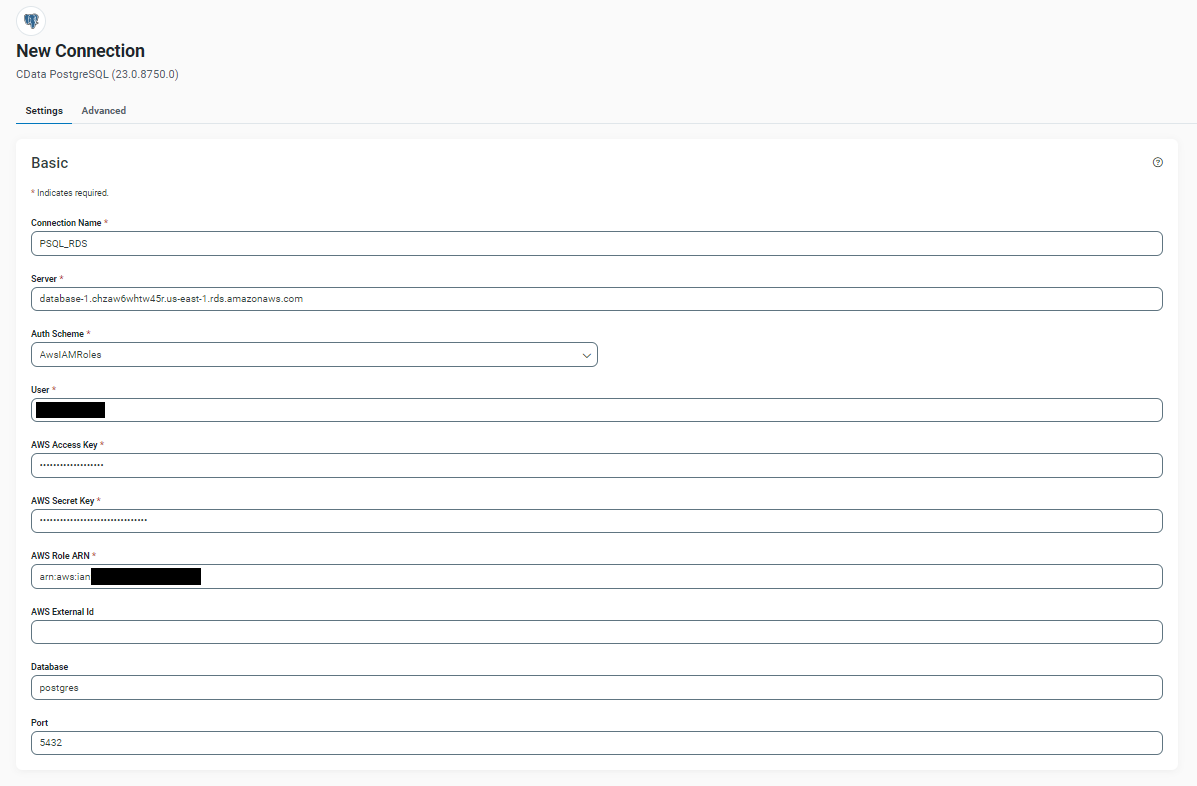
- Set the following connection properties:
- Connection Name: Name the PostgreSQL connection
- Server: Enter the endpoint of your RDS instance.
- AuthScheme: AWSIAMRoles
- User: Enter the same username you created in PostgreSQL (Section: Step 2)
- AWS Access Key: Created for the IAM user.
- AWS Secret Key: Enter the corresponding secret key for which you have created the access key.
- AWS Role ARN: IAM Role ARN
- Database: Enter the database name used in the RDS instance.
- Port: Enter the port number from the RDS instance.
- UseSSL: True
- SSLServerCert= *
Note: These configurations are applicable for connecting to any edition of the PostgreSQL driver.
Each of these steps plays a crucial role in setting up a secure and efficient cloud-based PostgreSQL database using Amazon RDS, IAM Authentication, and CData Sync/CData PostgreSQL Driver. They collectively contribute to enhancing the security, manageability, and scalability of your database operations.
Try CData Sync Today
To effortlessly integrate live and on-demand data with incredible speed and accuracy, sign up for a 30-day free trial of CData Sync!