Microsoft Exchange, like other Microsoft services, allows accounts to impersonate other users to collect data. This functionality is often used for service accounts, so that they can work to access data in the background without requiring user input.
This article serves as a guide for setting up the correct permissions for an account to be able to impersonate a set of accounts and access their mailboxes and calendars.
Creating an Impersonation Role Group
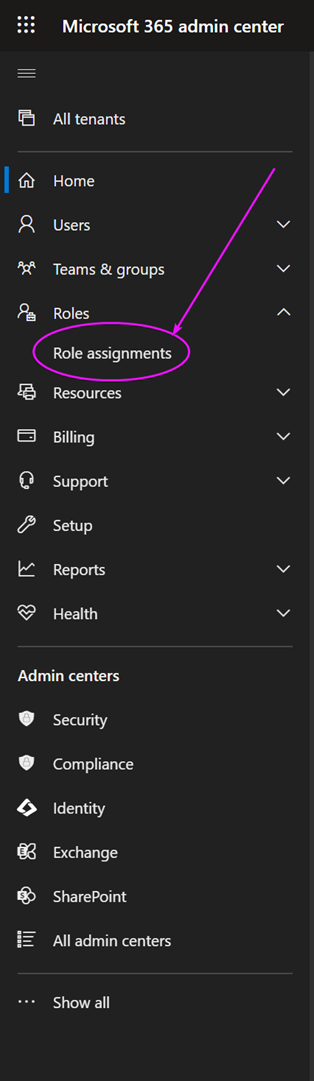
- To start, navigate to the Microsoft 365 Admin Center as a system administrator. Under "Roles", navigate to "Role assignments".
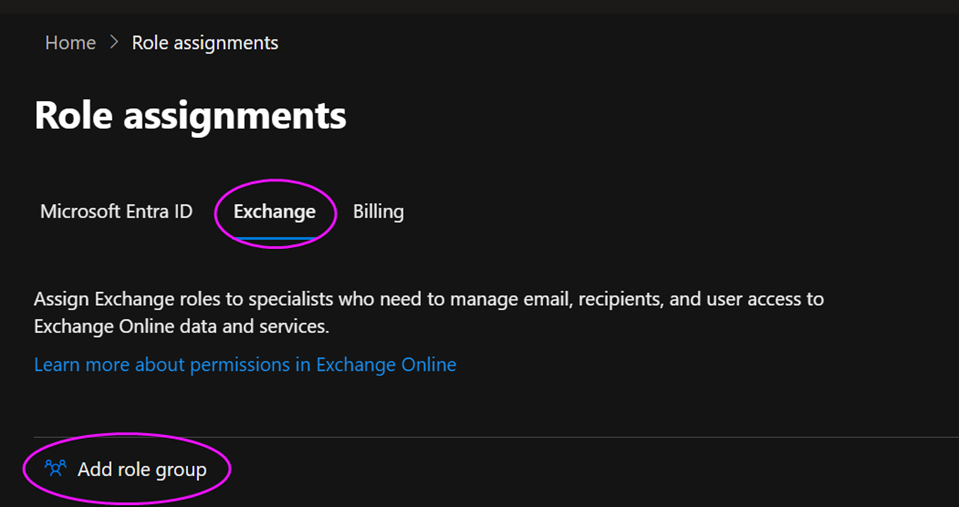
- Select the "Exchange" tab. Then, select the "Add role group" button.
We will be creating a role group for impersonation permissions. Any account that requires these permissions will receive them by being added to this group. - On the "Basics" step, fill in the Name and Description fields. For "Write scope", you can either select the Default option, or select a custom scope. If the custom scope you wish to use does not yet exist, you can create it using PowerShell by following these instructions. (Note: you can also create the role group in PowerShell by following Step 3 of the instructions and using the flag "-Role ApplicationImpersonation").
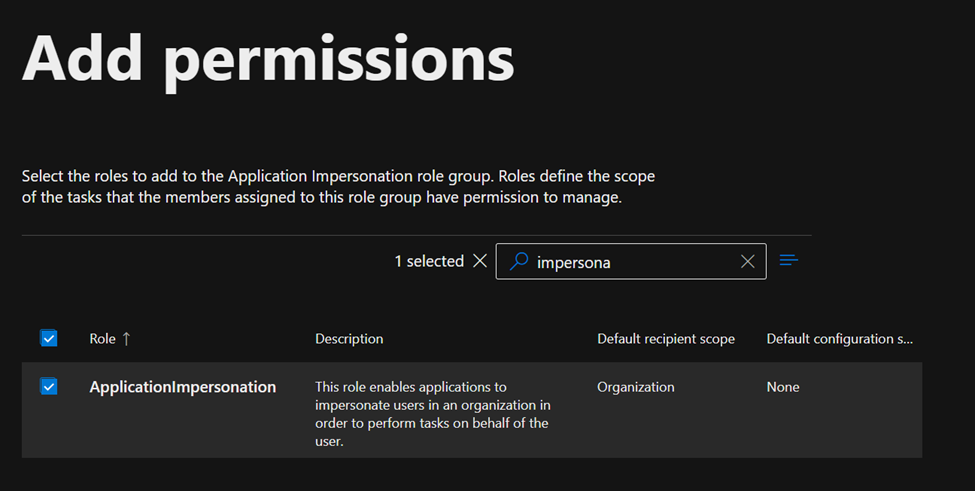
- Click the "Next" button to move to the "Permission" step.
Here, find the ApplicationImpersonation permission and select it. Any other permissions you wish to grant this role are optional. - On the "Admins" step, add whichever accounts you wish to be able to impersonate the users in your role group’s write scope.
- Complete the "Review and finish" step.
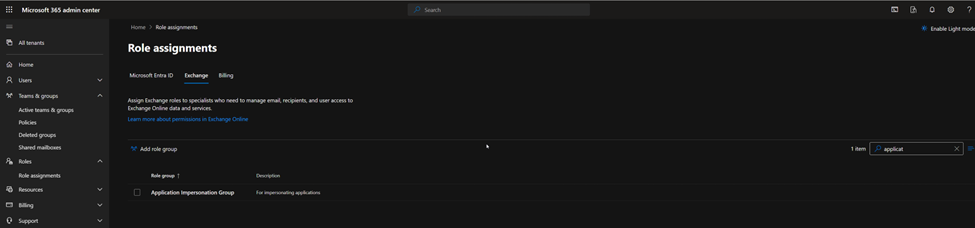
If you ever need to change the scope, permissions, or members ("admins") of the role group, you can do so by going back to the Role assignments page and selecting the new role group you have created.
Setting the Impersonation properties in the Driver
In the Driver properties, set the User and Password properties to those of an account that is part of the role group that you just created.
In the ImpersonationType property, select the identifier you want to use to identify the account being impersonated (from "PrincipalName", "SID", "PrimarySmtpAddress", and "SmtpAddress").
In the ImpersonationUser property, identify the user being impersonated (using the type of identifier selected in ImpersonationType).