The API Connector in CData Sync lets you connect to any API (on-premises or cloud-based) that produces XML or JSON data. This means that you can replicate data from custom or proprietary APIs from your preferred tools and applications, just like you can with data from any of the 250+ natively supported sources.
This article guides you through the process of creating a connection to an API and creating tables for various API endpoints. In this article, we will use the Trip Pin RW OData reference services, but the principles apply to any API.
Create the connection and configure API settings
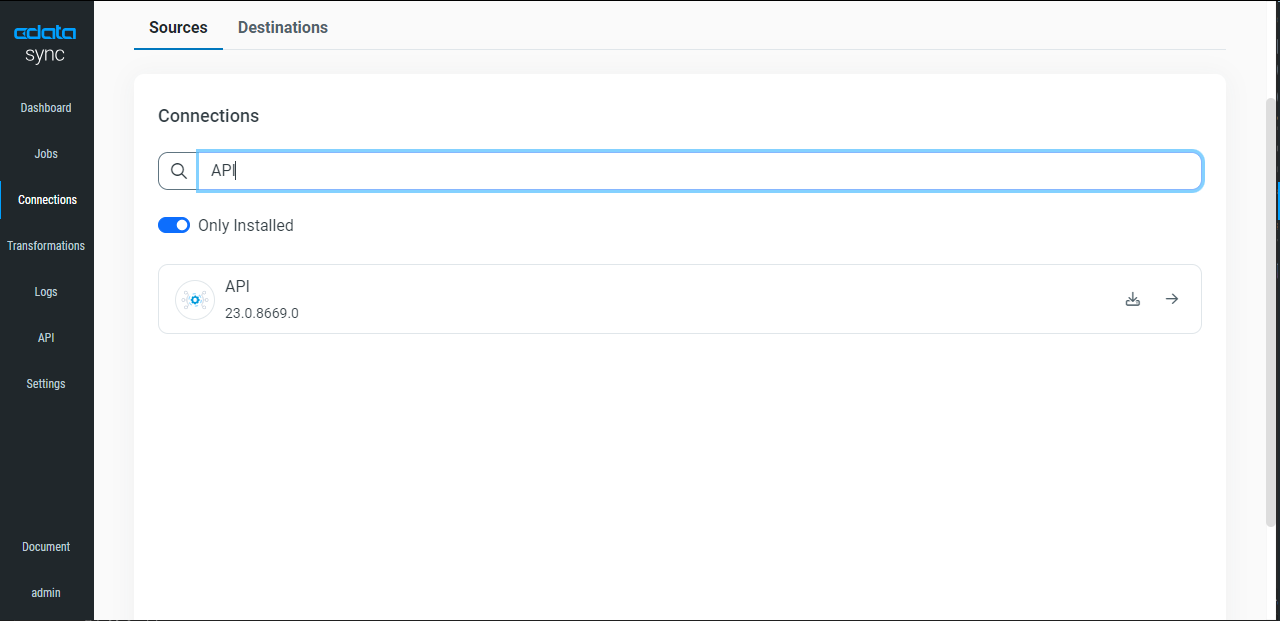
- Navigate to the Connections page of CData Sync and click + Add Connection. Search for "API" and choose the API connector.
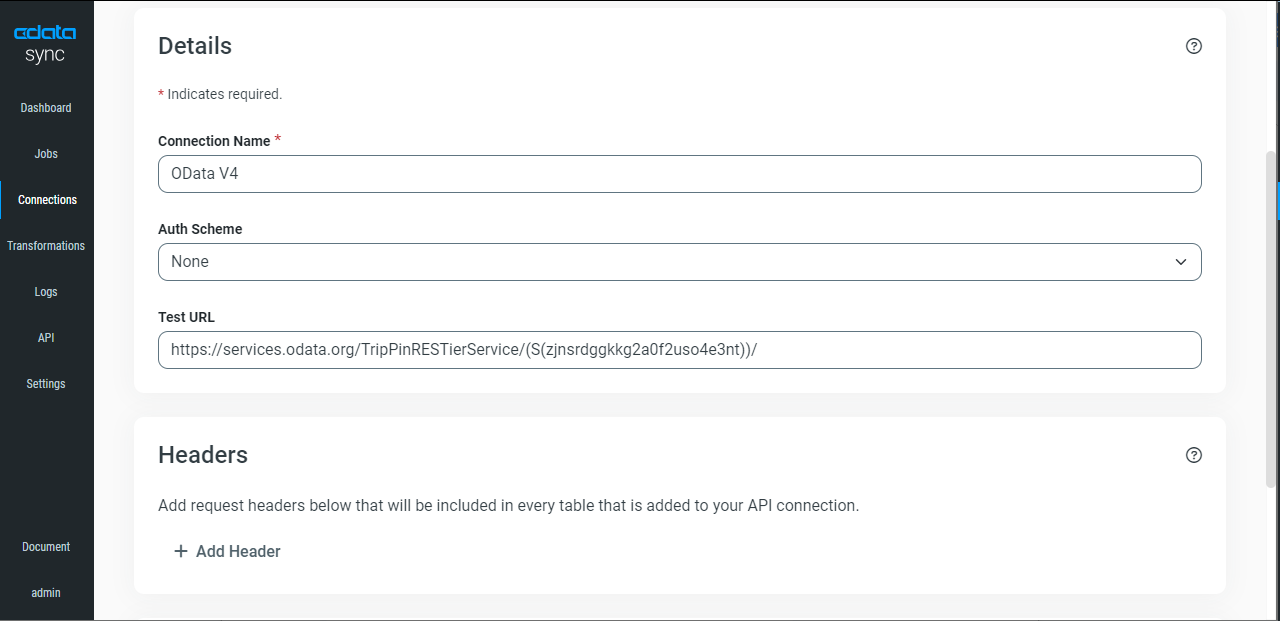
- Next name the connection and configure the top-level API Settings.
Auth Scheme
By default, an API connector is set to "None" for its Auth Scheme. The sample OData API doesn't require authentication, so we will leave Auth Scheme as "None."
For more information on the different authentication types available, refer to our documentation.
Test URL
The Test URL is the URL that CData Sync uses to test authentication. Set this to the top-most URL or base URL for your API. For the sample OData API, we use https://services.odata.org/TripPinRESTierService/
Headers
To add HTTP headers that are sent with all API calls, click + Add Header and set the properties:
- Enter the header name in the Name field.
- Specify the value of the header in the Value field.
To add additional headers, click + Add Header and repeat the above steps as required.
Since the sample OData API doesn't require any headers, we can leave this section blank.
Create & Test
After configuring the top-level settings, click Create & Test to ensure the connection is configured properly. Re-open the connection to add tables.
Creating tables
When creating tables for API Connector, it is important to remember that each table must be created individually to be listed in the Connector’s catalog. To do so, navigate to the Tables tab for your connection, click + Add Table, and follow the steps below.
Request Details
Choose either Get or Post for the request type, depending on your API specification. Then enter the URL of your API endpoint (e.g. "https://services.odata.org/v4/TripPinServiceRW/People"). If you select Post, supply the Body to include in the API request.
Set the Format of the API response. We use JSON for the OData API.

Parameters
You can add URL parameters to be sent with all API requests for this table. To create a parameter:
- Enter the parameter Name.
- Specify the parameter Value.
To add additional parameters, click Add Param and repeat the steps above.
Headers
You can add HTTP headers that are sent with all API requests for this table. These headers are in addition to the headers configured when configuring the API connector itself. To add a new header:
- Enter the header Name.
- Specify the Value of the header.
To add additional headers, click Add Header and repeat the steps above.
Table Details
Next you must tell the connector how to model the API’s response into a table. You can use the wizard to make this easier or directly edit the table data settings.
Configure table details using the wizard
- Click Configure Table in Table Details section to open the configuration wizard.
- In the configuration wizard, verify the API response, and click Next.
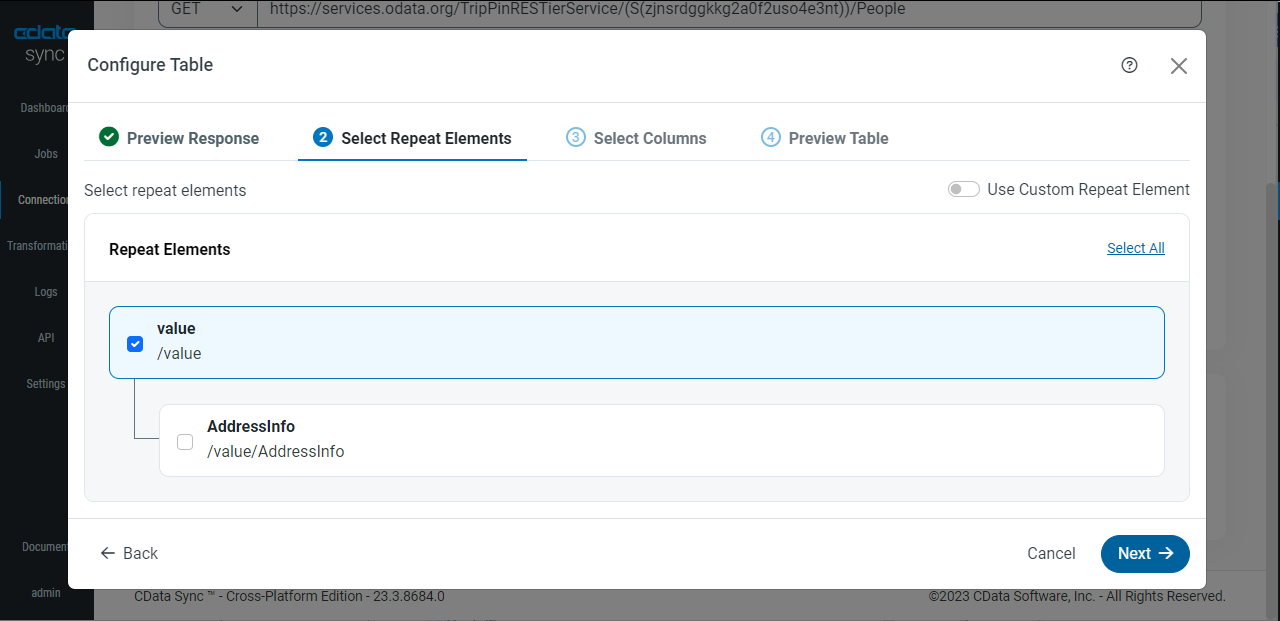
- Use the checkboxes to specify the Repeat Elements. These are the elements in your API endpoint response which contains the repeating items to be used as rows. You can select multiple repeat elements if there are repeated elements within multiple paths in the response.
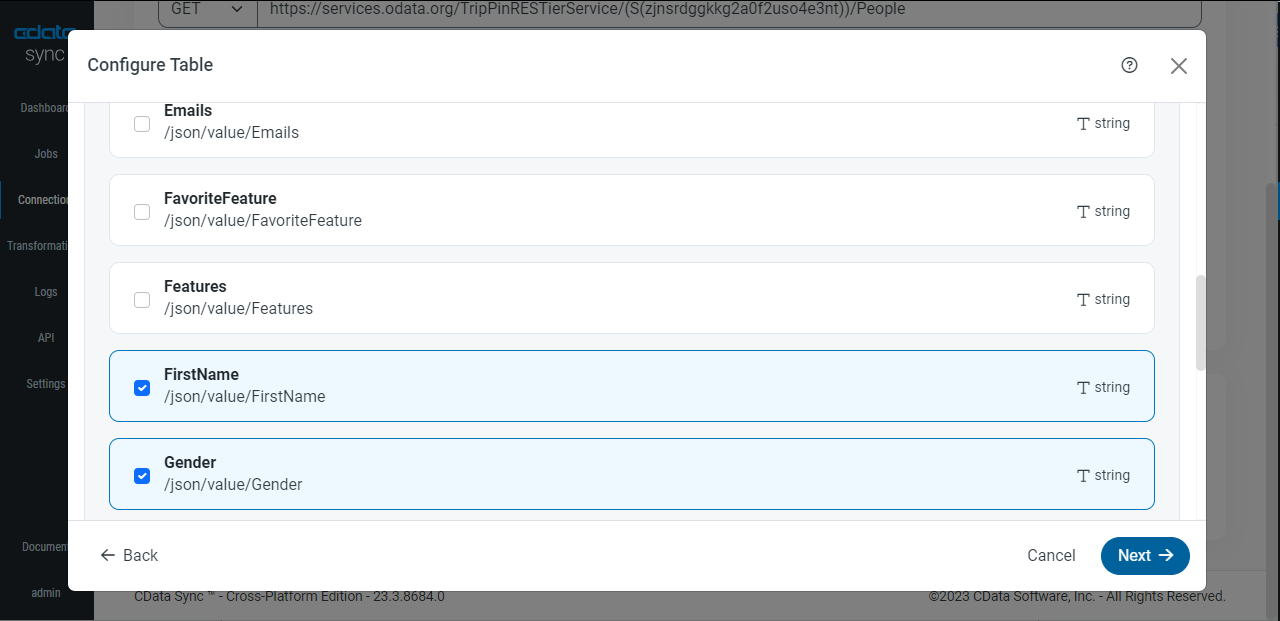
- Use the checkboxes on the left to select the columns to include in your table. Once you have selected your columns, click Next.
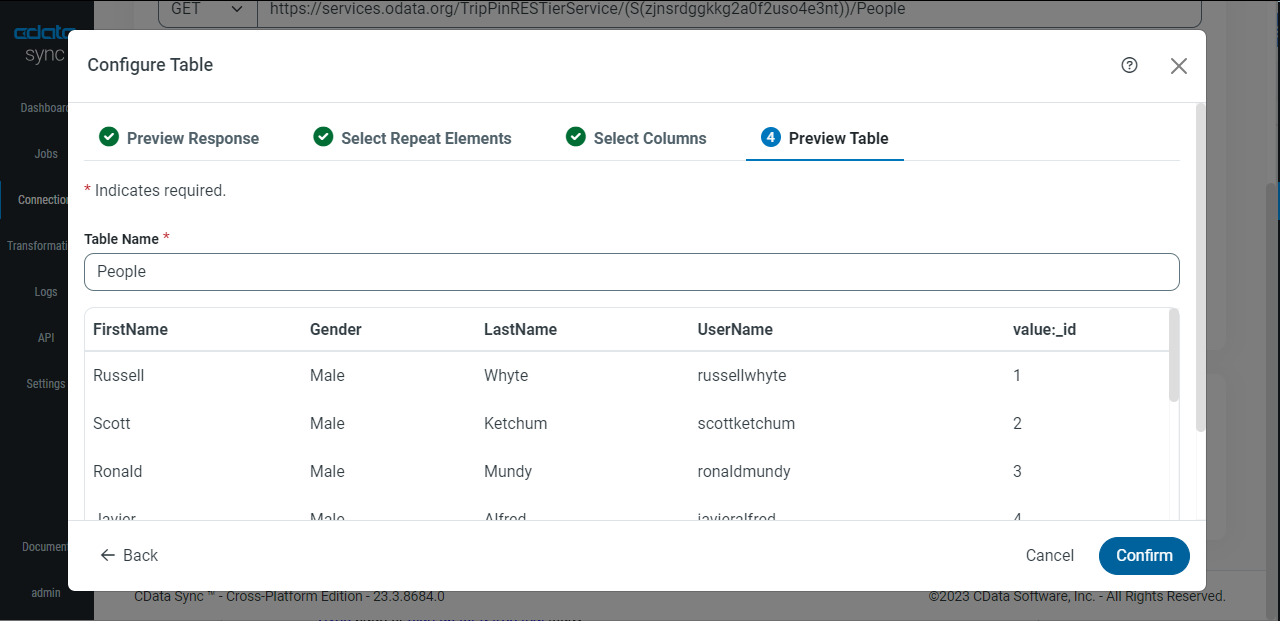
- Double check the preview of your table, set the Table Name (e.g. "People") and click Confirm. The Configuration Wizard automatically imports all selected columns into the correct fields, using the path to the field in the response. You can also edit these fields as needed or add new ones manually outside the wizard.

Filters
After creating the table with columns, you can create filters to define the behavior of the API Connector when a WHERE clause is issued during a query. Filters can improve performance by delegating filtering to the API. If no filters are included, query options are processed by CData Sync instead. We won't enable filters in this example, but to learn more, refer to our documentation.
Pagination
After creating the table with columns, you can configure pagination for your API responses (managing when multiple responses are required to return all of the results of a query). We won't enable filters in this example, but you can select from a variety of pagination types, supporting the vast majority of APIs.You can choose from these types:
- None - Select this type if the API request returns the full data set in one response.
- Offset - Select this type when the API request provides a record offset parameter for paging. For more details, see Offset Type.
- Number - Select this type when the API request includes a parameter to specify the current page number. For more details, see Number Type.
- Token - Select this type when the API response includes a token for the next page. For more details, see Token Type.
- URL- Select this type when the API response includes a URL for the next page. For more details, see URL Type.
To learn more about pagination with the API Connector, refer to our documentation.
Free trial & more information
To learn more about CData Sync and start replicating data from your API data (and data from 250+ other SaaS, Big Data, and NoSQL sources) directly to your preferred data store, visit our CData Sync page or sign up for a free trial today!