Running CData Sync API endpoints using C# code is a powerful way to manage your data transformation and synchronization tasks. This can be accomplished within the Microsoft Visual Studio environment, using an ASP.NET Core Web API project.
Two authentication methods are available for this process. The first is Basic Authentication, which utilizes the username and password of your sync application. The second method involves using Authentication Tokens, which can be generated within CData Sync. This article demonstrates how you can efficiently run your CData Sync jobs using C# code by leveraging these methods.
NOTE: Please note that the C# code used in this article can be used only in the cross-platform (JAVA) version of the CData Sync application.
Authentication methods
We can run the API endpoint using C# code with two authentication methods:
- Basic Authentication: Use your CData Sync username and password.
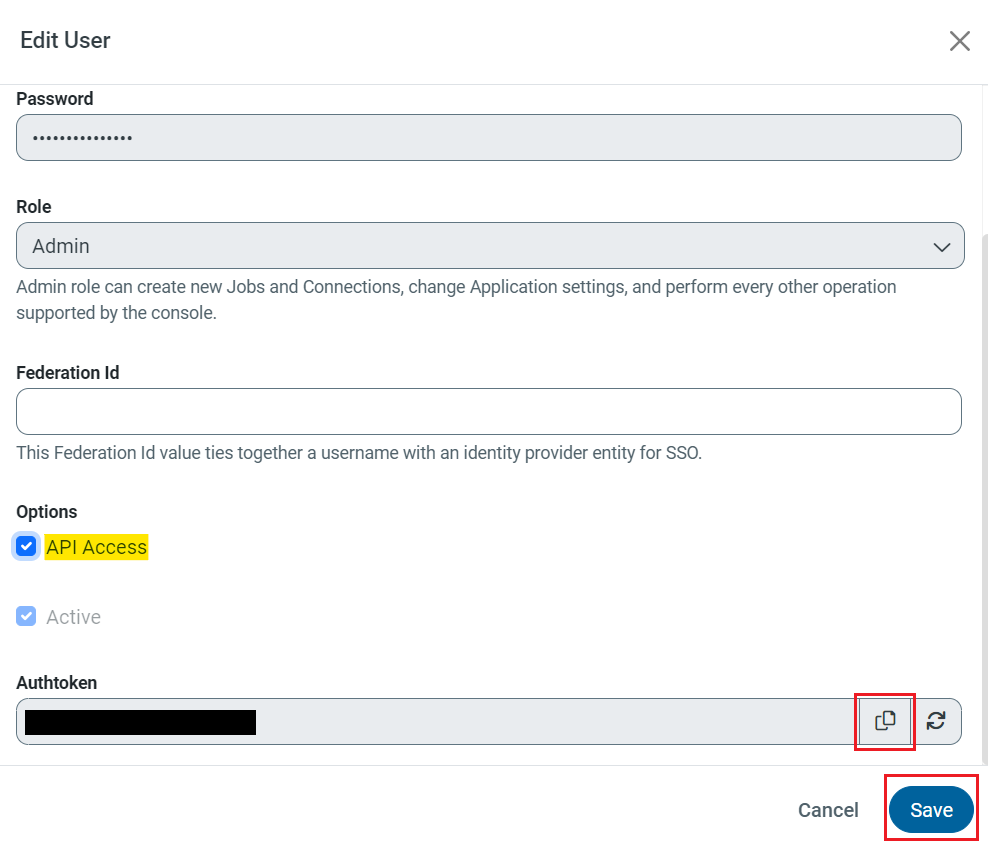
- AuthToken: Obtain the authentication token from CData Sync by following the steps: Settings -> Users -> Username -> Edit. Copy the token and click on “Save”.
Set up ASP.NET Core Web API project on Visual Studio
To execute HTTP (GET and POST) requests in CData Sync using C#, you need to set up a new project in Visual Studio. Follow these steps to get started:
- Open Visual Studio and click on “Create a new project” under Get Started.
- Search and select the project template named “ASP.NET Core Web API” and click on “Next”.
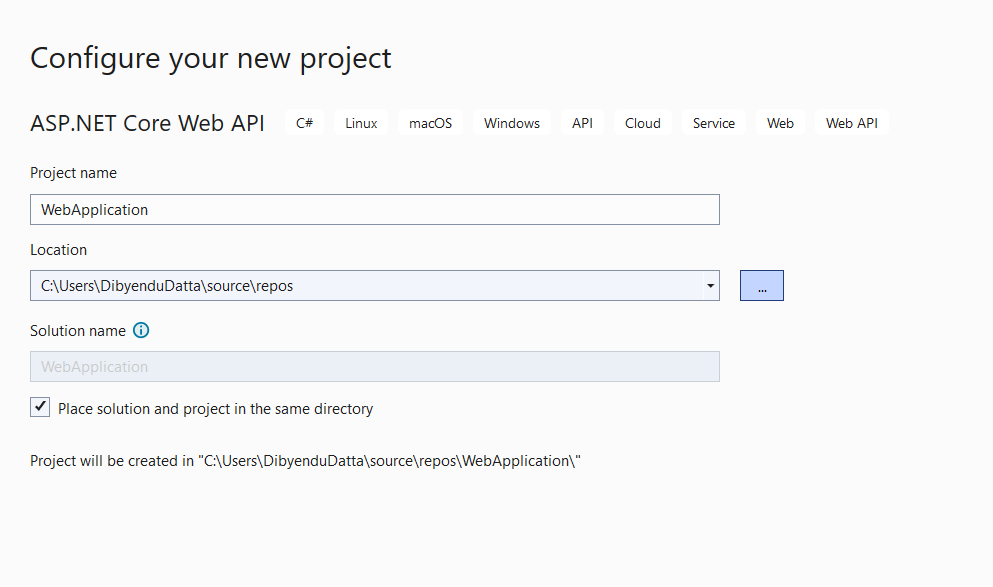
- Enter the name of the project and set the location where you wish to store it.
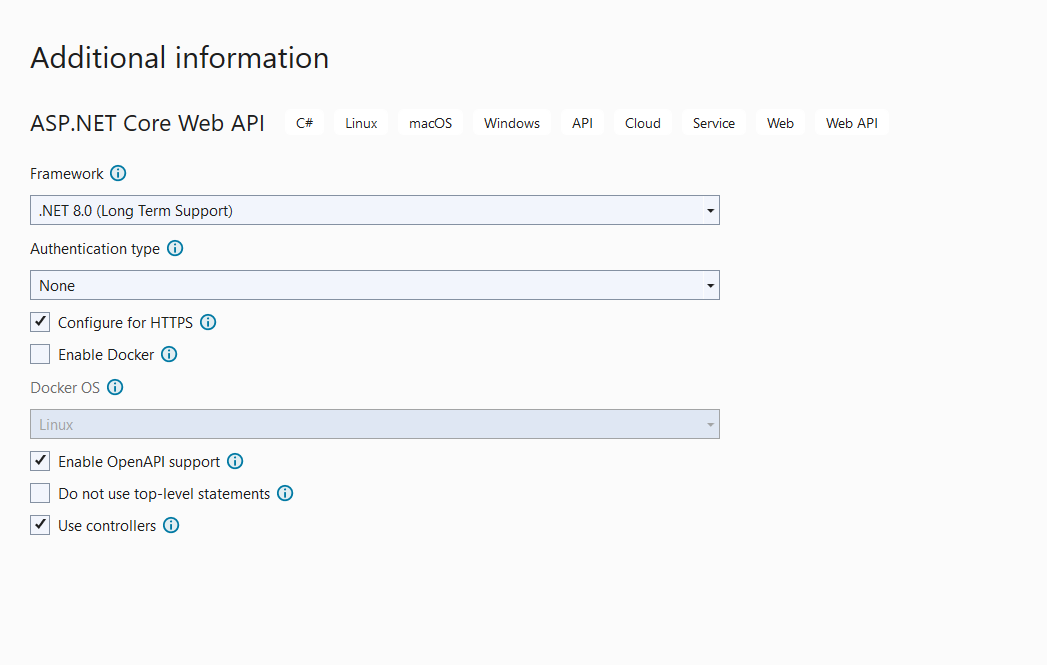
- Select the Framework and Authentication type and click on “Create”.
- Double click on “Program.cs” in the Solution Explorer.
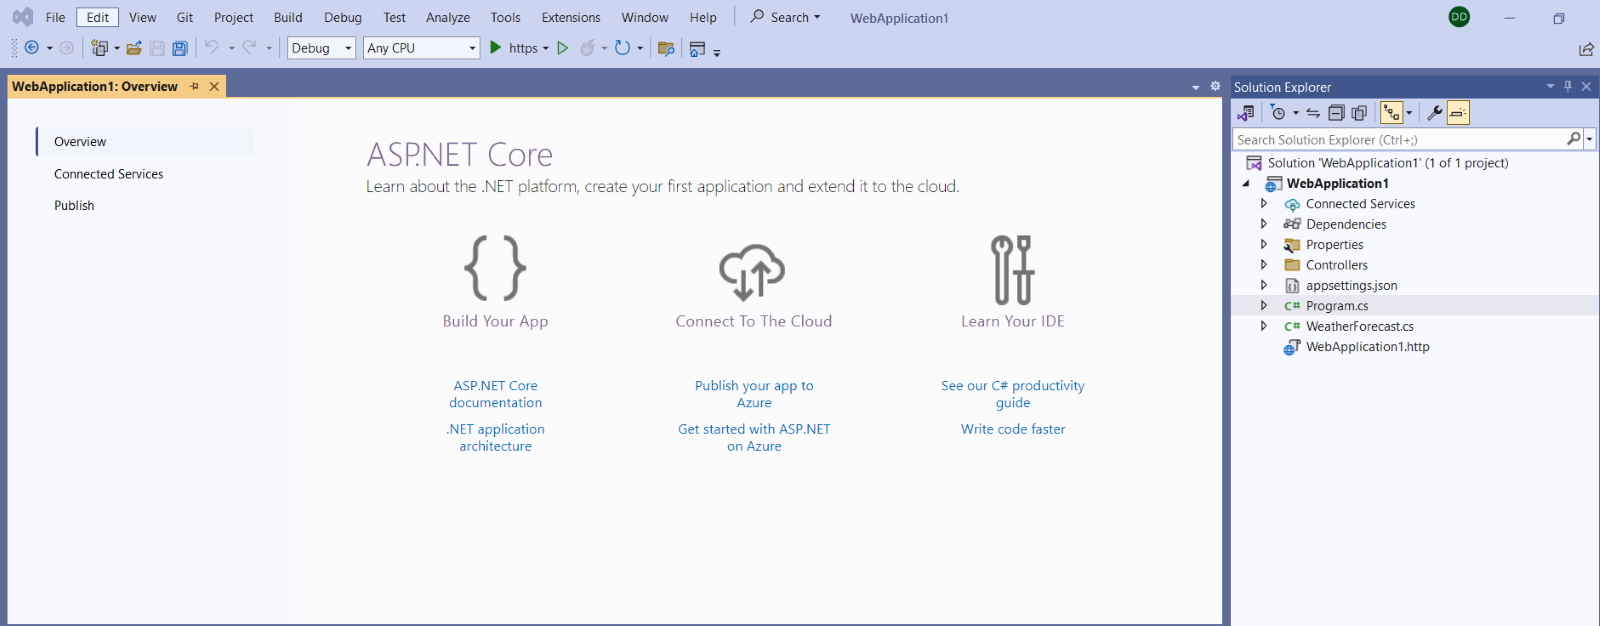
- Add and execute the C# code in the program.cs console that opens up.
Execute GET and POST requests with both methods
We have attempted running both the GET request to list the jobs and the POST request to execute the job using both authentication types:
- Execute the GET request to retrieve job details using Basic authentication.
- Execute the GET request to retrieve job details using an AuthToken.
- Execute the POST request to run the job using Basic authentication.
- Execute the POST request to run the job using an AuthToken.
Please note that we have provided these four requests as examples, but these codes can execute all API requests.
1. Execute the GET request to retrieve job details using Basic authentication
Use the sample code provided below, ensuring you fill in the CData Sync username and password in the specified places:
using System;
using System.Net.Http;
using System.Text;
using System.Threading.Tasks;
namespace httpClient {
class Program {
static async Task Main(string[] args) {
// Username and password for basic authentication
string username = "<Your password>";
string password = "<Your username>";
// Concatenate username and password separated by colon
string credentials = $ "username:password";
// Encode credentials in Base64
string credentialsBase64 = Convert.ToBase64String(Encoding.ASCII.GetBytes(credentials));
// URL to which you are making the GET request
string url = "http://localhost:8181/api.rsc/jobs/";
// Create an HttpClient instance
using(HttpClient client = new HttpClient()) {
// Add authorization header with Basic scheme and encoded credentials
client.DefaultRequestHeaders.Authorization = new System.Net.Http.Headers.AuthenticationHeaderValue("Basic", credentialsBase64);
// Send the GET request
HttpResponseMessage response = await client.GetAsync(url);
// Check if request was successful
if (response.IsSuccessStatusCode) {
// Read the response content
string responseBody = await response.Content.ReadAsStringAsync();
Console.WriteLine(responseBody);
} else {
Console.WriteLine($ "Failed to get data. Status code: {response.StatusCode}");
}
}
}
}
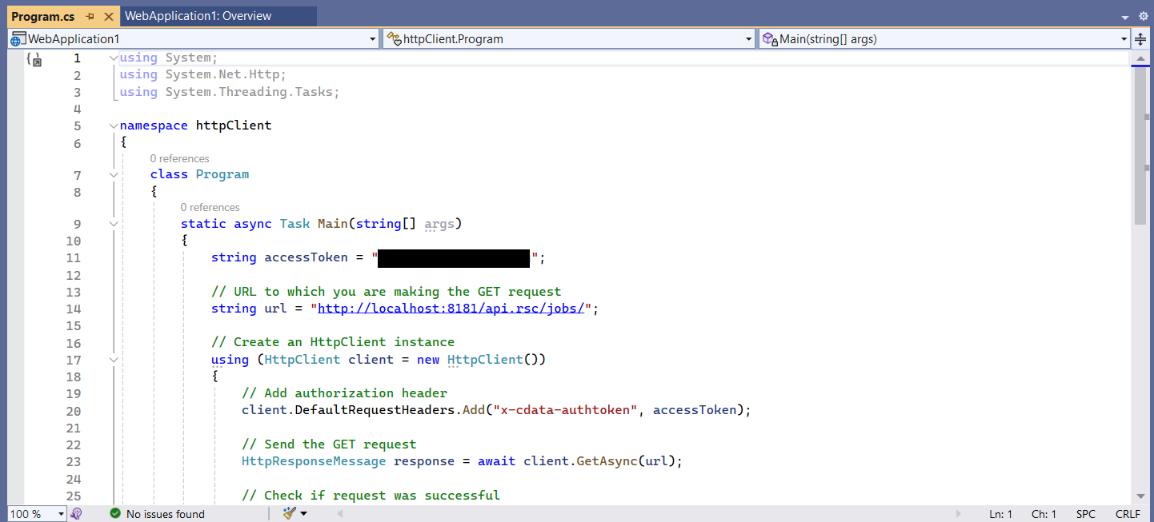
}2. Execute the GET request to retrieve job details using AuthToken
Use the sample code provided below, ensuring you fill in the saved AuthToken from CData Sync wherever specified:
using System;
using System.Net.Http;
using System.Threading.Tasks;

namespace httpClient {

  class Program {

    static async Task Main(string[] args) {

      string accessToken = "<Your auth token>";

      // URL to which you are making the GET request
      string url = "http://localhost:8181/api.rsc/jobs/";

      // Create an HttpClient instance
      using(HttpClient client = new HttpClient()) {

        // Add authorization header
        client.DefaultRequestHeaders.Add("x-cdata-authtoken", accessToken);

        // Send the GET request
        HttpResponseMessage response = await client.GetAsync(url);

        // Check if request was successful
        if (response.IsSuccessStatusCode) {

          // Read the response content
          string responseBody = await response.Content.ReadAsStringAsync();

          Console.WriteLine(responseBody);

        } else {

          Console.WriteLine($ "Failed to get data. Status code: {response.StatusCode}");

        }
      }
    }
  }
}
3. Execute the POST request to run the job using Basic authentication
Use the sample code provided below, making sure to enter the CData Sync username and password in the defined places in the code. Also, include the Job ID (retrieved from the Derby database at the backend) and the Job Name (as used in CData Sync) to execute the code:
using System;
using System.Net.Http;
using System.Text;
using System.Threading.Tasks;

namespace httpClient {

  class Program {

    static async Task Main(string[] args) {

      // Username and password for basic authentication
      string username = "<Your username>";
      string password = "<Your password>";

      // Concatenate username and password separated by colon
      string credentials = $ "username:password";

      // Encode credentials in Base64
      string credentialsBase64 = Convert.ToBase64String(Encoding.ASCII.GetBytes(credentials));

      // URL to which you are making the POST request
      string url = "http://localhost:8181/api.rsc/executeJob/";

      // Data to be sent in the request body (if any)
      string postData = "{\"JobId\": \"value\", \"JobName\": \"value\"}";

      // Create an HttpClient instance
      using(HttpClient client = new HttpClient()) {

        // Add authorization header with Basic scheme and encoded credentials
        client.DefaultRequestHeaders.Authorization = new System.Net.Http.Headers.AuthenticationHeaderValue("Basic", credentialsBase64);

        // Create StringContent with the data to be sent in the request body
        var content = new StringContent(postData, Encoding.UTF8, "application/json");

        // Send the POST request
        HttpResponseMessage response = await client.PostAsync(url, content);

        // Check if request was successful
        if (response.IsSuccessStatusCode) {

          // Read the response content
          string responseBody = await response.Content.ReadAsStringAsync();

          Console.WriteLine(responseBody);

        } else {

          Console.WriteLine($ "Failed to get data. Status code: {response.StatusCode}");

        }
      }
    }
  }
}
4. Execute the POST request to run the job using an AuthToken
Use the sample code provided below, making sure to enter the saved AuthToken in the defined place in the code. Also, include the Job ID (retrieved from the Derby database at the backend) and the Job Name (as used in CData Sync) to execute the code:
using System;
using System.Net.Http;
using System.Text;
using System.Threading.Tasks;

namespace httpClient {

  class Program {

    static async Task Main(string[] args) {

      string accessToken = "<Your auth token>";

      // URL to which you are making the POST request
      string url = "http://localhost:8181/api.rsc/executeJob/";

      // Data to be sent in the request body (if any)
      string postData = "{\"JobId\": \"value\", \"JobName\": \"value\"}";

      // Create an HttpClient instance
      using(HttpClient client = new HttpClient()) {

        // Add authorization header
        client.DefaultRequestHeaders.Add("x-cdata-authtoken", accessToken);

        // Create StringContent with the data to be sent in the request body
        var content = new StringContent(postData, Encoding.UTF8, "application/json");

        // Send the POST request
        HttpResponseMessage response = await client.PostAsync(url, content);

        // Check if request was successful
        if (response.IsSuccessStatusCode) {

          // Read the response content
          string responseBody = await response.Content.ReadAsStringAsync();

          Console.WriteLine(responseBody);

        } else {

          Console.WriteLine($ "Failed to get data. Status code: {response.StatusCode}");

        }
      }
    }
  }
}
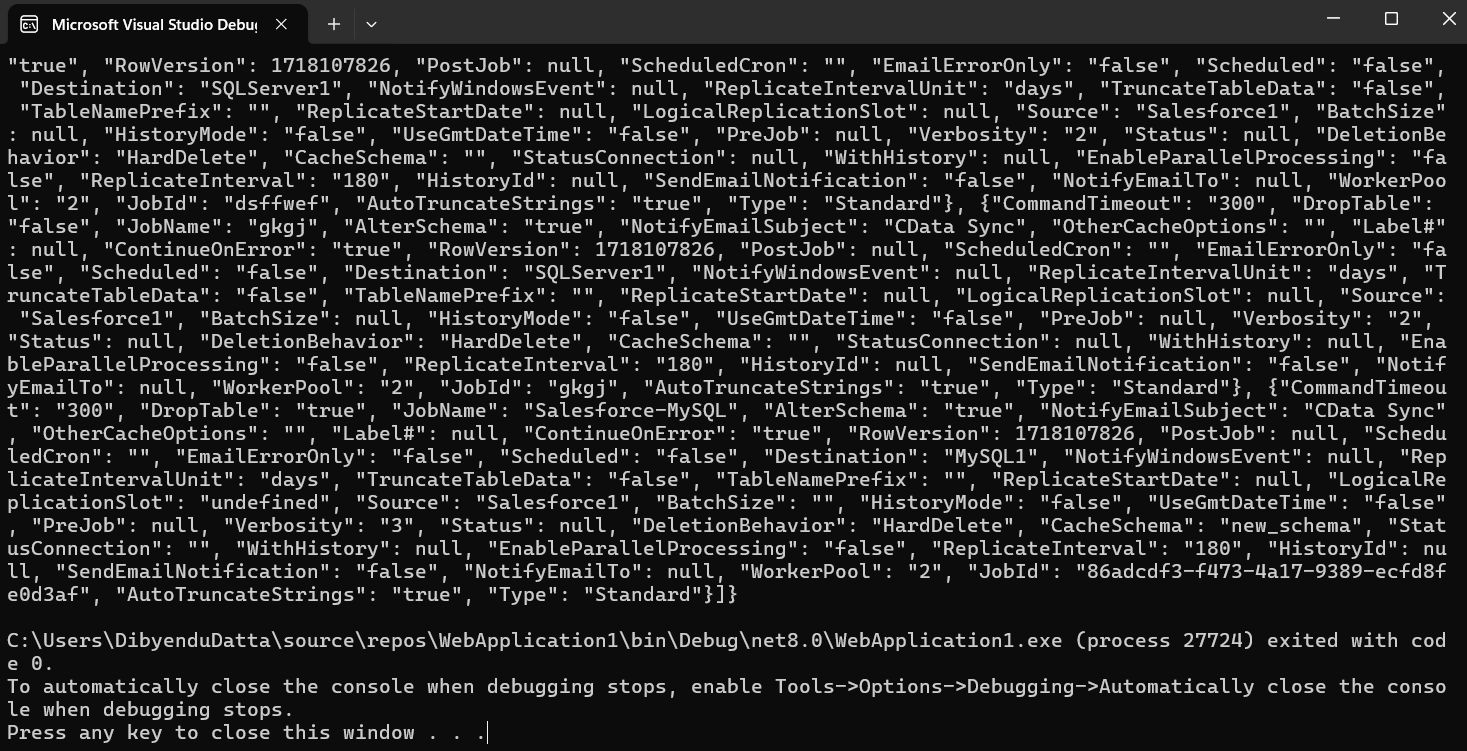
After executing these codes in Visual Studio, a command prompt will appear with all the necessary job details. Press "Enter" to close the prompt.
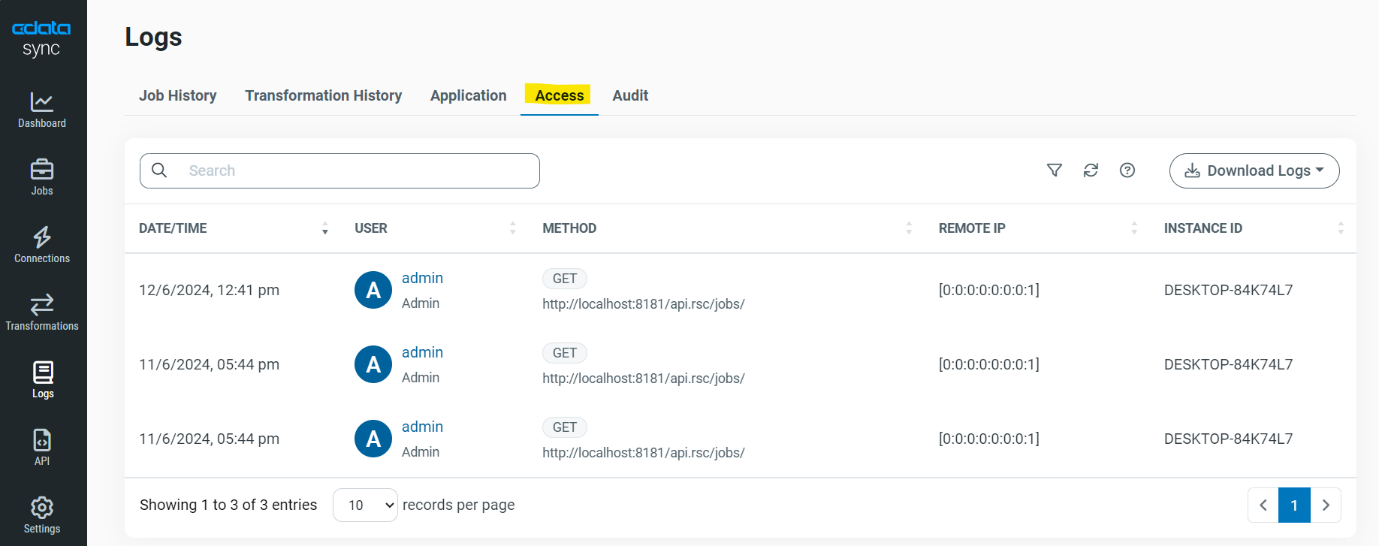
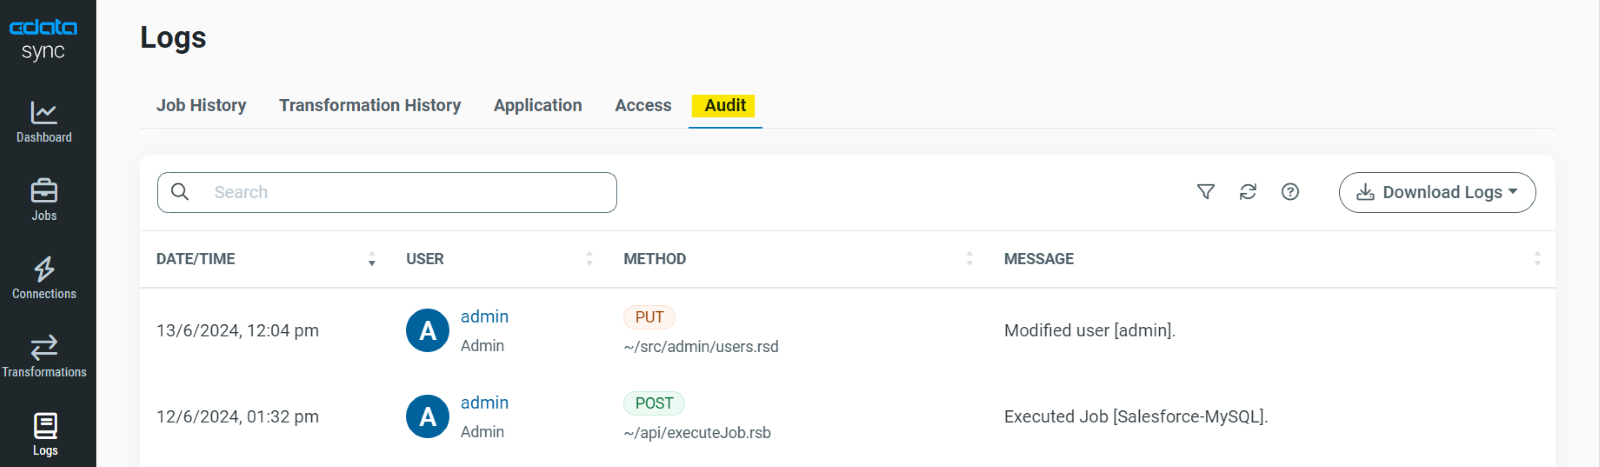
To verify that the GET and POST requests were executed correctly, check the "Access" and "Audit" logs, respectively, in the "Logs" section (See below).
Try CData Sync Today
To effortlessly integrate live and on-demand data with incredible speed and accuracy, sign up for a 30-day free trial of CData Sync!