I found out that I need Tableau Bridge in order to “bridge” my CData ODBC driver with Tableau Cloud. Do you have any instructions you can share?

Solved
How can I set up Tableau Bridge with a CData ODBC Drivers?

Best answer by James T
Connect to data as an ODBC Data Source
If you have not already, first specify connection properties in an ODBC DSN (data source name). This is the last step of the driver installation. You can use the Microsoft ODBC Data Source Administrator to create and configure ODBC DSNs.
CData ODBC driver downloads & documentation can be found here: https://www.cdata.com/odbc/
Install Tableau Bridge
Download & install the Tableau Bridge from the Tableau Bridge product page.
Installation instructions: https://help.tableau.com/current/online/en-us/to_bridge_install.htm
Set Up Tableau Bridge as a Service
- In the Server menu, select Start Tableau Bridge Client.
- Sign in to the Tableau Bridge using a site admin level account.
- If prompted, select the Tableau Cloud site where you want to publish live data. The bridge client will open and is accessible from the system tray.
- By default, the Tableau Bridge client is set to Application mode. Select 'Switch to service' to enable Tableau Bridge to handle live connections.
- Log in to your Tableau Cloud site as an administrator.
- From your site, click Settings, then Bridge.
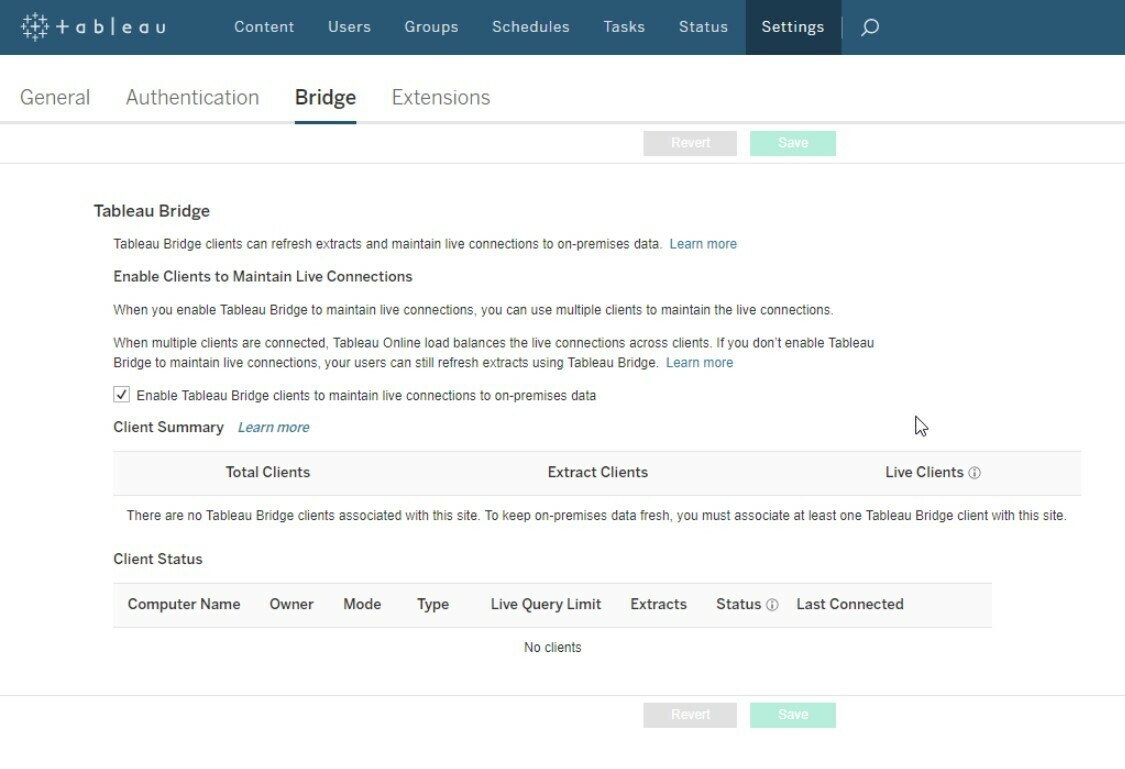
- In the Bridge settings, under Enable Clients to Maintain Live Connections, check the box labeled 'Enable
Publish a Dashboard Containing the Live Data Source
Having configured both the Tableau Bridge and Tableau Cloud to enable live data connections, you can now publish your workbook to Tableau Cloud. From the Server menu, select Publish Workbook.
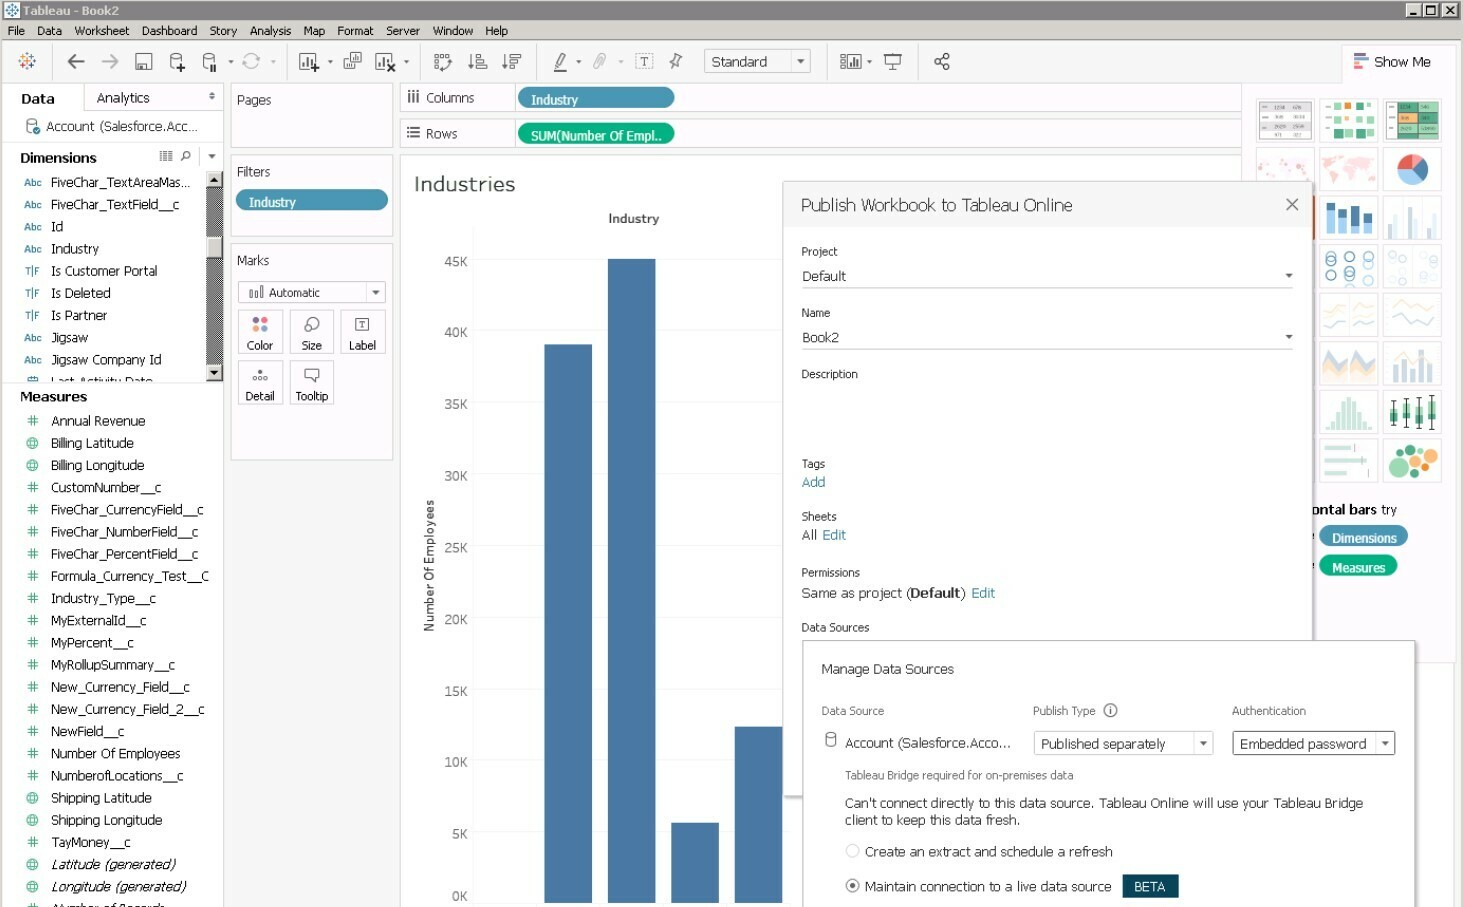
After choosing the workbook name and project that you wish to publish to, configure the deployment so that the CData ODBC driver is embedded in your workbook as a separate, live data source.
- Under Data Sources, select the option to Edit the embedded data sources in the workbook.
- Change Publish Type to 'Published separately,' then select a desired means of authentication.
- Last, select 'Maintain connection to a live data source' and click the green Publish Workbook button.
The published workbook now updates alongside the underlying data from your ODBC data source. From a published dashboard, simply click the Refresh button to reflect the most recent changes.
This topic has been closed for replies.

Enter your E-mail address. We'll send you an e-mail with instructions to reset your password.