Connecting LibreOffice to a CData JDBC connector is a relatively smooth process that can be done in just a few steps. In this walkthrough I will be using the WooCommerce JDBC connector.
-
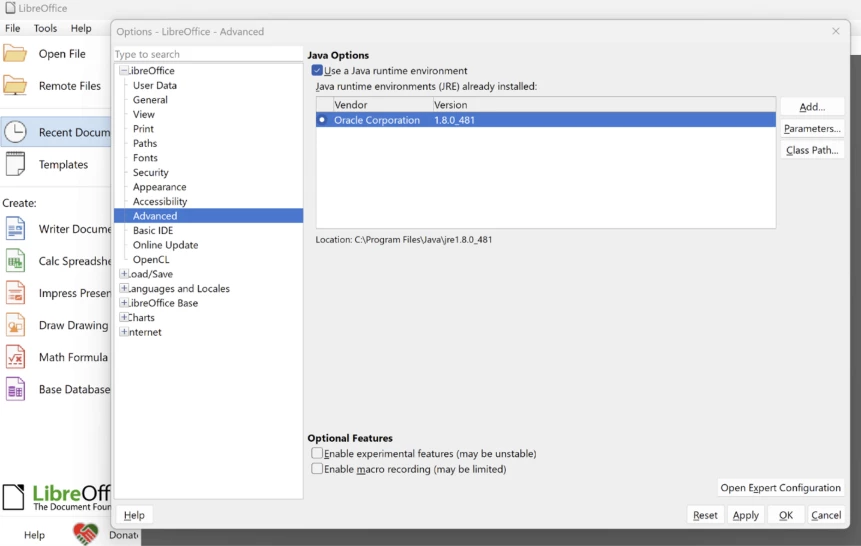
First, launch LibreOffice and in the top left, navigate from Tools -> Options -> LibreOffice -> Advanced, and ensure Libre has access to your 64 bit java run time environment installed on your machine.
Click “Add” in the top right, and navigate to JRE’s installed directory, which defaults to C:\Program Files\Java\jre<jre version here>
-
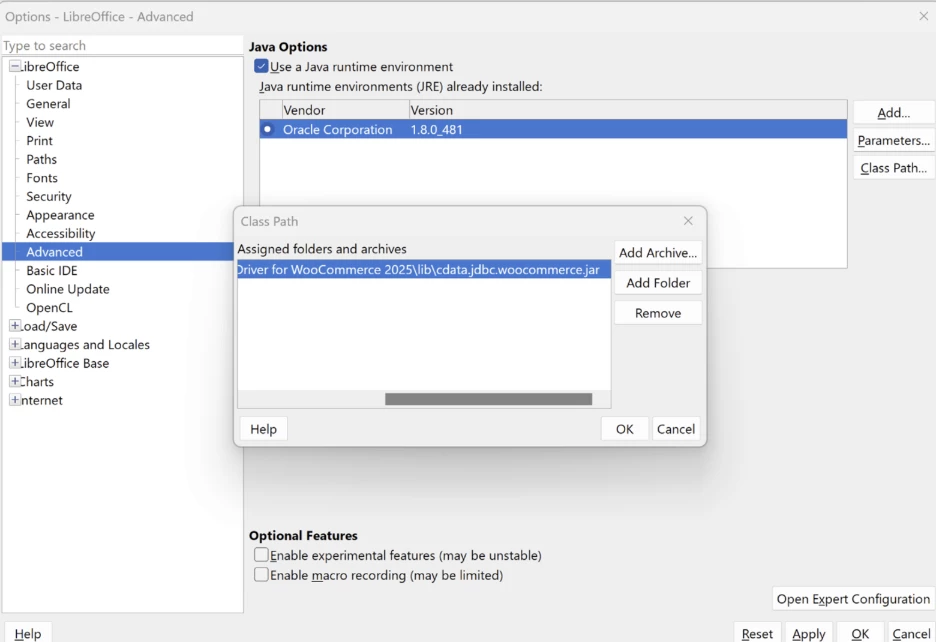
Next, we must let Libre know where the CData JDBC driver is by adding a Class Path on that same advanced settings page.
Click “Add Archive…” and navigate to the driver’s jar file. The driver installer defaults to something like C:\Program Files\CData\CData JDBC Driver for WooCommerce 2025\lib\cdata.jdbc.woocommerce.jar
Click “Ok” on the Class Path window, apply the Advanced Settings changes we made and then click “Ok” again.
-
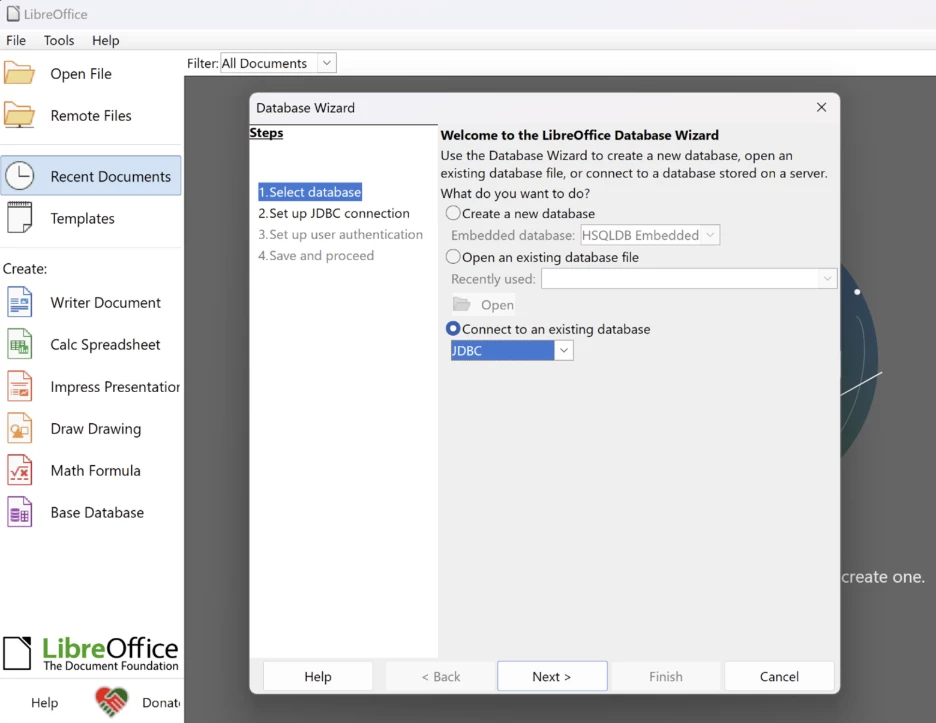
The next step is defining the JDBC database, which can be reached by clicking “Base Database” near the bottom left of LibreOffice. Then we specify we are connecting to an existing JDBC database and click next.
-
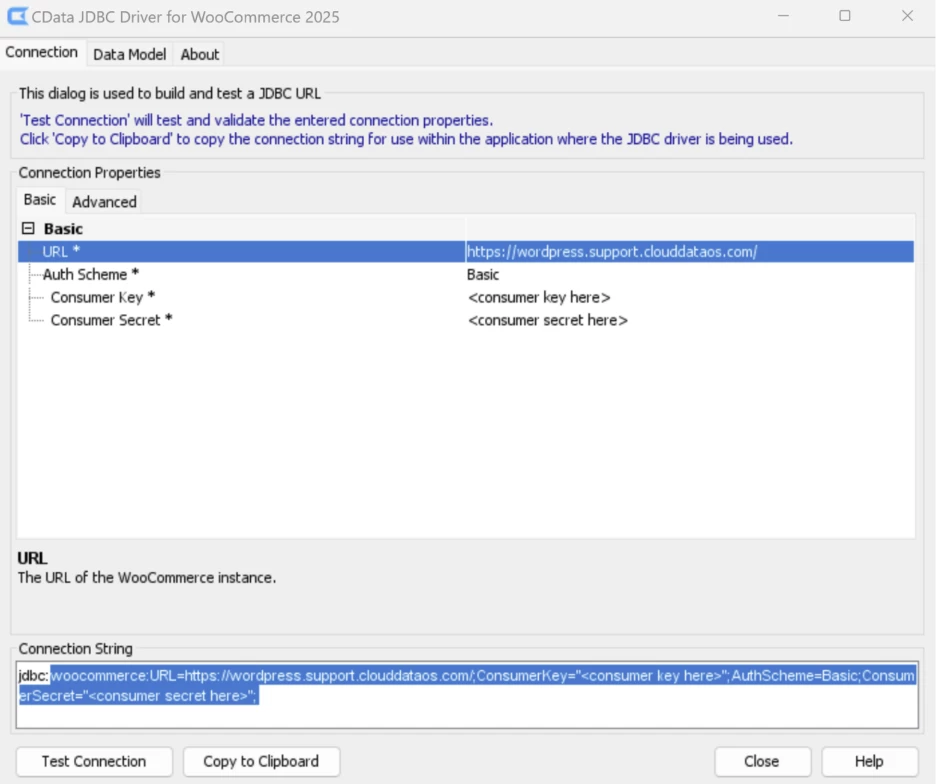
To set up the connection, we must define the JDBC connection string. This can be easily done by using the same cdata.jdbc.woocommerce.jar file we pointed to earlier for an interactive string building experience:
Be sure to copy the string after “jdbc:” as Libre automatically adds this to the string.
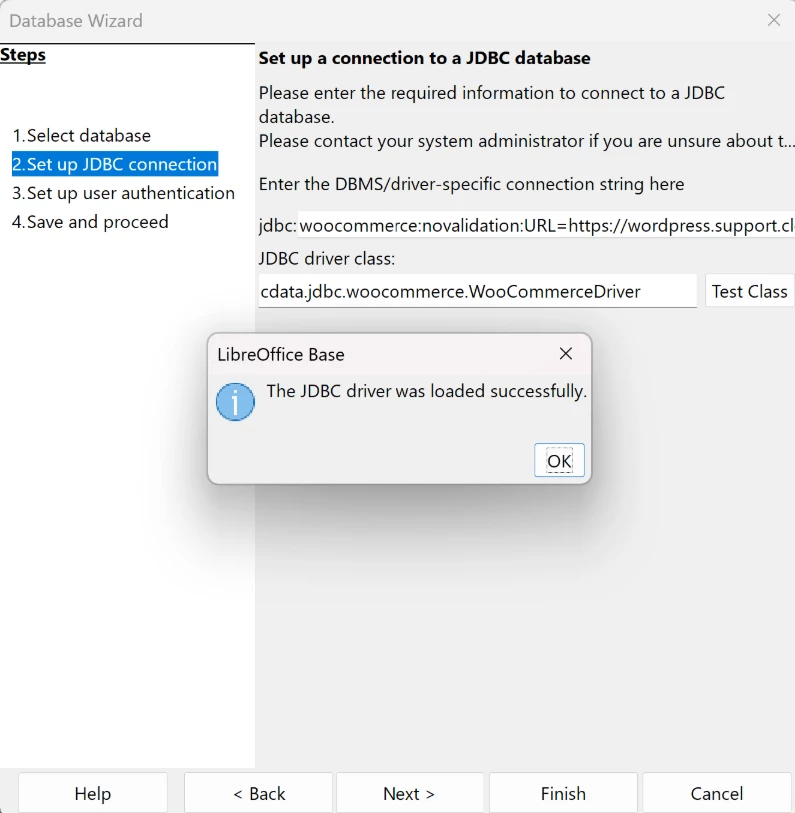
Because Libreoffice appends a connection property of its own named type to the connection string, as a workaround we can define the JDBC URL in an alternative way to skip the validation of the connection properties. The JDBC URL should look like below:
jdbc:woocommerce:novalidation:URL="<url_here>";ConsumerKey=" <ck_here>";AuthScheme=Basic;ConsumerSecret="<cs_here>";
-
Next, we specify which driver to use by setting Class Name to the specific name for the JDBC driver. In this example case, it would be: cdata.jdbc.woocmmerce.WoocommerceDriver.
-
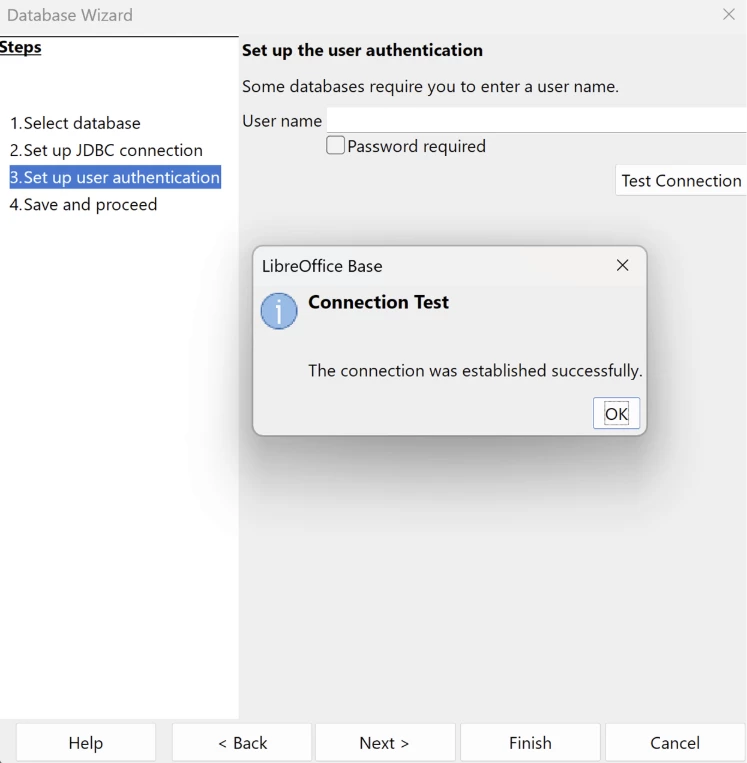
The “Set up user authentication” page can be skipped since authentication is generally handled by our driver’s connection string, but we can test to make sure the connection string is correct and Libre can connect:
-
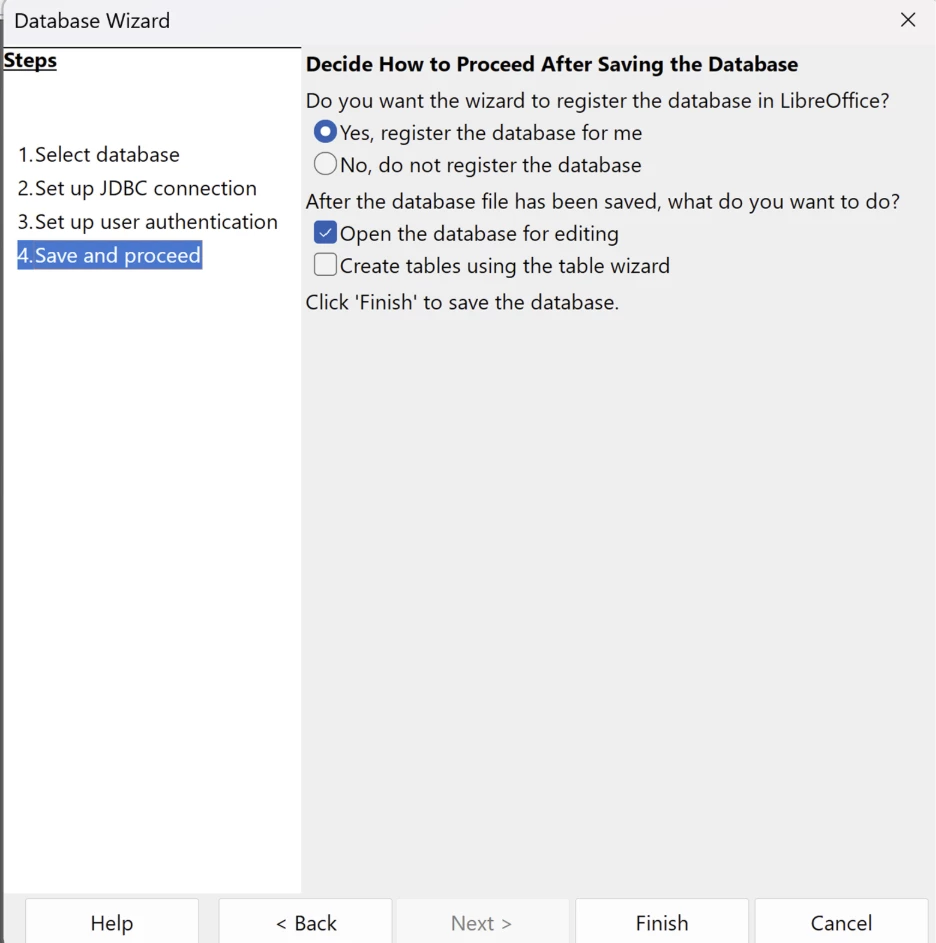
On the “Save and proceed” page, use the default settings and click “Finish”.
LibreOffice will open a file explorer window, allowing you to name your new database and specify a directory to save it.
-
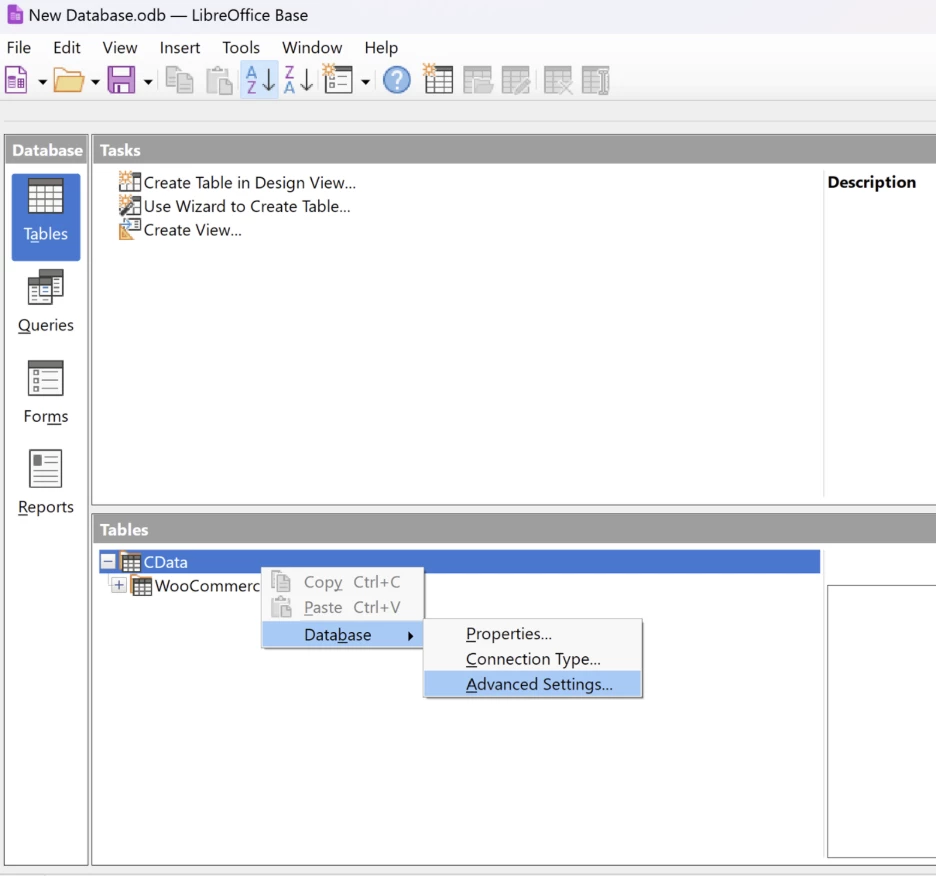
The last step is a quick configuration change. Libre defaults to trying to read data in both directions, while CData drivers only support forward reading. To change this, right click “CData” in the Tables window and go to Database -> Advanced Settings.
Finally, check the last “Respect the result set type from the database driver” box and click “Ok”.
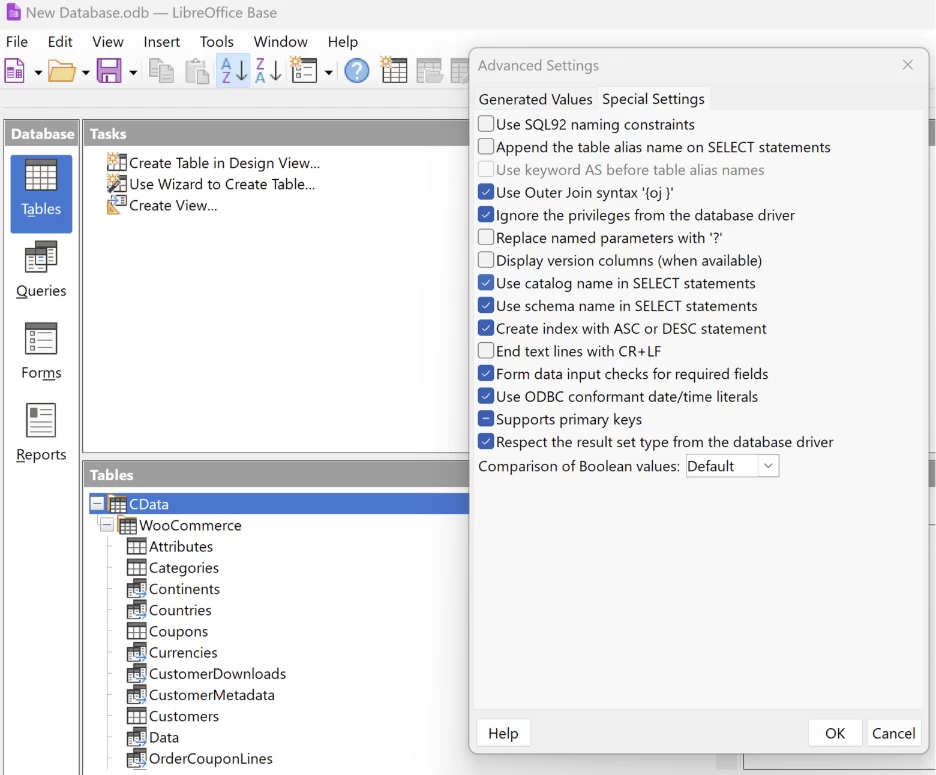
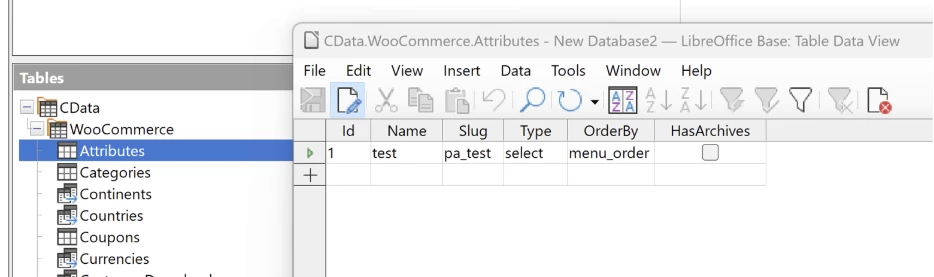
You can now query information from the tables and views exposed by the connection within LibreOffice: