The API Connector in CData Connect Cloud lets you connect to any cloud-based API that produces XML or JSON data. This means that you can work with data from custom or proprietary APIs from your preferred tools and applications, just like you can with data from any of the 250+ natively supported sources.
This article guides you through the process of creating a connection to an API and creating tables for various API endpoints. In this article, we will use the Trip Pin RW OData v4 reference services, but the principles apply to any API.
Create the connection and configure global settings
- Navigate to the Connections page of Connect Cloud and click "+ Add Connection." Search for "API" and choose the API connector.
- Next name the connection and configure the Global Settings.


Authentication
By default, an API connector is set to No Auth for its Authentication Type. The sample OData API doesn't require authentication, so we will leave the Type as "No Auth."
For more information on the different authentication types available, refer to our documentation.
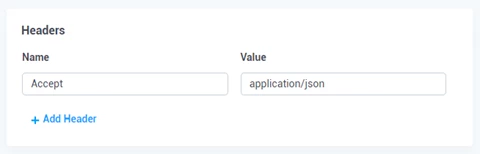
Headers
To add HTTP headers that are sent with all API calls, do the following:
- Enter the header name in the Name field.
- Specify the value of the header in the Value field.
To add additional headers, click Add Header and repeat the above steps as required.
While the sample OData API doesn't require any headers, we can add an "Accept" header with the value "application/json" to tell the server that CData Connect Cloud can understand and process JSON responses.
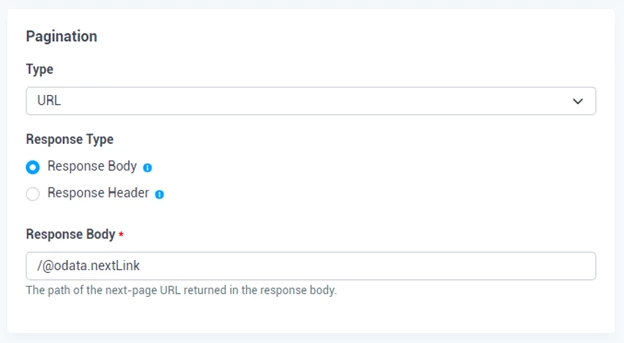
Pagination
You can specify the pagination Type to use with API Connector to manage paged responses (when a service only returns a subset of the collection with each request).
The OData V4 API response for the People entity set (https://services.odata.org/v4/TripPinServiceRW/People) looks like the following:
{
  "@odata.context": "http://.../TripPinServiceRW/$metadata#People",
  "@odata.nextLink": "https://.../TripPinServiceRW/People?%24skiptoken=8",
  "value": [
    {
      "@odata.id": "http://.../TripPinServiceRW/People('russellwhyte')",
      "@odata.etag": "W/\"08DBBDFC84D9BE44\"",
      "@odata.editLink": "http://.../TripPinServiceRW/People('russellwhyte')",
      ...,
    },
    ...
}
The @odata.nextLink field represents the URL of the next "page" of data for the API. Set the Pagination Type to "URL," select "Response Body" for Response Type and set Response Body to "/@odata.nextLink" (the "/" indicates the top of the response body) to configure pagination for our example API.
Advanced
The Verbosity field should be left at 1 unless required for troubleshooting purposes.
After creating an API connection, proceed to Creating Tables.
Creating tables
When creating tables for API Connector, it is important to remember that each table must be created individually to be listed in the Connector’s catalog. To do so, follow the steps below.
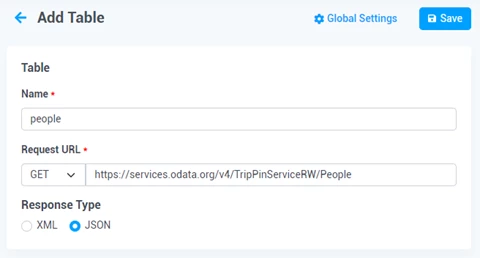
- Click Add to begin creating a new table.
- Enter a Name for the table (e.g. "people").
- In Request URL, choose either Get or Post. If you select Post, supply the Body to include in the API request. Then enter the URL of your API endpoint (e.g. "https://services.odata.org/v4/TripPinServiceRW/People").
- Select JSON as the Response Type.
Parameters
You can add URL parameters to be sent with all API requests for this table. To create a parameter:
- Enter the parameter Name.
- Specify the parameter Value.
To add additional parameters, click Add Param and repeat the steps above.
Headers
You can add HTTP headers that are sent with all API requests for this table. These headers are in addition to the headers configured when configuring the API connector itself. To add a new header:
- Enter the header Name.
- Specify the Value of the header.
To add additional headers, click Add Header and repeat the steps above.
Table Data
Next you must tell the connector how to model the API’s response into a table. You can use the wizard to make this easier or directly edit the table data settings.
Configure table data using the wizard
- Click Configure in the upper right of the Table Data section to open the configuration wizard.
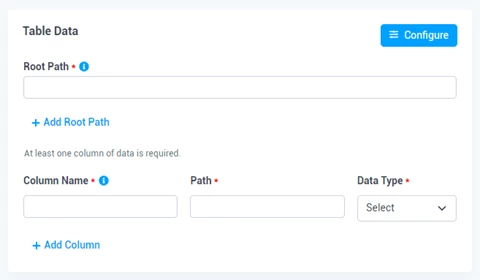
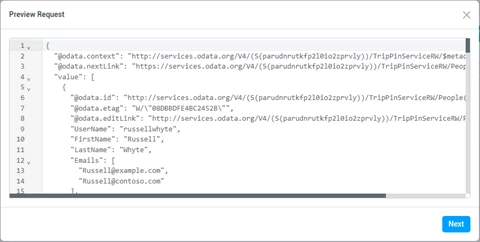
- In the configuration wizard, verify the API response, and click Next.
- Use the checkboxes on the right to specify the Root Path. This is the path of the element in your API endpoint which contains the repeating items to be used as rows. You can select multiple root paths if there are repeated elements within multiple paths in the response.
- Use the checkboxes on the left to select the columns to include in your table. Once you have selected your columns, click Next.

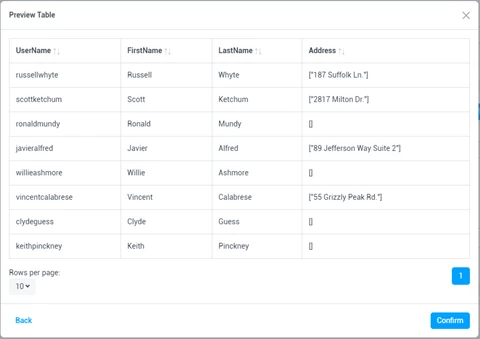
- Double check the preview of your table and click Next. The Configuration Wizard automatically imports all selected columns into the correct fields. You can also edit these fields as needed or add new ones manually outside the wizard.
Filters
After creating the table with columns, you can create filters to define the behavior of the API Connector when a WHERE clause is issued during a query. Filters can improve performance by delegating filtering to the API. If no filters are included, query options are processed by Connect Cloud instead. We won't enable filters in this example, but to learn more, refer to our documentation.
Free trial & more information
To learn more about CData Connect Cloud and get live data access to your API data (and data from 100+ other SaaS, Big Data, and NoSQL sources) directly from your cloud applications, visit our CData Connect Cloud page or sign up for a free trial today!